Latency, Buffer Size, and Monitoring: Reducing Delay in Your Setup
Learn how to optimize latency on any recording setup.
 3,5 / 5,0 |
Latency, Buffer Size, and Monitoring: Reducing Delay in Your Setup · Source: Steinberg

We explore concepts like Latency, Buffer Size, and Monitoring, and ways to understand and troubleshoot problems in your recording setup.
In this Article:
When you’re trying to record something, and there’s a noticeable delay in your headphones, it can really ruin the flow of the session. You could be attempting to record vocals or guitar, using external MIDI instruments like e-drums, or trying to play instrument plugins with your MIDI keyboard.
As soon as latency comes into play, the process of getting our ideas down is interrupted, which can be frustrating. However, when we understand some of the key areas in the audio and MIDI chain, we can root out the problems causing latency and get back to what matters most – creating music!
Latency, Buffer Size, and Monitoring: What Is Latency?
When an audio or MIDI signal travels from one side of your system to the other, latency is the amount of time this process takes. With audio specifically, the signal being captured must be converted from analogue to digital, then processed in your DAW, and finally, converted back to analogue so we can hear it in the headphones.
Although this process happens almost instantaneously, a fractional amount of delay is introduced at each stage.
Within a recording system, there are different types of latency:
- Input latency: Delay in the A/D conversion process and getting the signal into your DAW
- Output latency: Delay in the D/A conversion process and playing back from your DAW to your monitoring system
- Round-trip latency: The total amount of delay from the input to the output stages
- Plugin latency: The additional delay introduced through processing or triggering sounds within a plugin
Naturally, there will always be a certain amount of latency present, but the idea is to keep this to a minimum. This is because excessive amounts of delay will affect the timing and the performer’s confidence while recording.
Latency, Buffer Size, and Monitoring: Understanding Buffer Size
To optimize the amount of latency for recording or mixing, we can adjust the buffer size in our DAW. The host computer running the DAW performs audio processing in small increments using a buffer. The size of this buffer determines the number of samples being processed at a given time, and this is also affected by your chosen sample rate (44.1, 48, 96 kHz).
While a smaller buffer size of 128 samples or fewer will reduce latency considerably, it also places more strain on your CPU. This is why producers often bounce their project down to audio tracks when it’s time to record vocals, ensuring there is minimal processing going on besides the recording being captured.
Alternatively, when we’re dealing with projects with monster track counts during production or mixing, we can expand the buffer to 256 or 512 samples to give the CPU more room to cope with the workload. You’ll know when your buffer size is set too low because you’ll start experiencing playback glitches or hearing clicks and pops. Also, most DAWs have a low-latency mode specifically designed to reduce latency for monitoring while recording.
Latency, Buffer Size, and Monitoring: Recording vs Mixing
When it comes to the buffer size, a common mistake is to keep the same settings for tracking (recording) and mixing.
Recording
Try to use the lowest possible buffer size your CPU can handle stably.
- 128 samples or lower for vocals or guitars
- 64 samples or lower for instrument plugins
Decreased latency allows the performer to focus on their timing and groove while improving the accuracy of a singer’s pitch.
Mixing
When you’re done with the recording stage, you can increase the buffer to reduce the load on your CPU.
It’s time to load up your endless plugin chains, so increasing the buffer to 256, 512, or even 1025 samples in extreme cases ensures that the playback is smooth on busy projects.
This process of setting your buffer according to the task at hand is a standard part of a music production workflow.


Why Do Plugins Increase Latency?
While not all plugins noticeably increase latency, some of them need more time to process, particularly when they’re using analysis engines or oversampling.
Plugins that usually add latency include:
- Linear-phase EQs
- Compressors with a lookahead function
- Noise reduction processors
- Convolution reverbs
While most DAWs automatically compensate for plugin latency, the delay can still be noticeable when recording.
Tip: Create a tracking-friendly session with only a few plugins or none at all, and save the processing for the mixing stage.
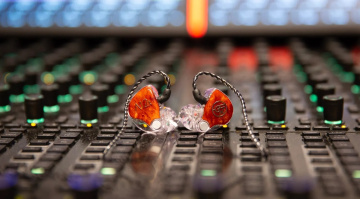
Latency, Buffer Size, and Monitoring: DSP Monitoring
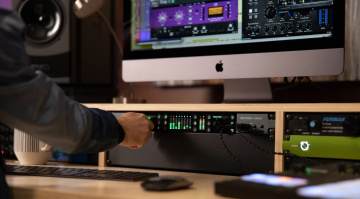
Many audio interfaces have built-in DSP engines, with a range of effects such as compression, EQ, and reverb that run externally rather than on your native CPU.
Some modern interfaces include built-in DSP processing that allows effects like EQ, compression, and reverb to run directly on the hardware instead of your computer. These software-managed systems allow you to create excellent headphone mixes with ultra-low latency.
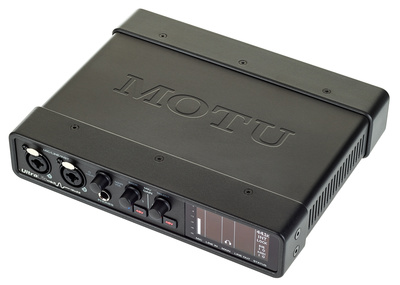
Some DSP engines also allow you to add compression and reverb before the signal hits your DAW, which can enhance the recording process, especially for vocals. You can find these systems inside audio interfaces from brands like Universal Audio, MOTU, RME, and Antelope Audio.

Latency, Buffer Size, and Monitoring: Optimizing Your System For The Lowest Latency
The latency you experience when recording isn’t only down to your audio interface settings. It’s also how your system is configured and managed. If your computer is chaotic, this can affect your DAW performance.
To optimize your system:
Close All Background Applications
Apps for cloud sync, communication, and web browsing require RAM, and this can affect DAW performance. So before you start recording, close down any unnecessary software apps.
Use the Correct Drivers
If you’re on Windows, manufacturer-supplied ASIO drivers are usually the best for low-latency audio performance.
Be Wary Of Increasing Your Sample Rate
If you have a system that can handle it, using a higher sample rate can slightly improve latency as the audio buffers are processed faster. As a result, 96 kHz can feel more responsive than 44.1 kHz, but it also increases the load on the CPU and the file size of recordings.
Freezing or Bouncing Tracks
If your DAW project is particularly busy, freezing tracks or bouncing them to audio will free up system resources, which in turn allows you to reduce the buffer size for decreased latency.
Using Wired Connections
If possible, always use an audio interface with its own power supply, as bus-powered interfaces have disadvantages such as increased noise floor, reduced headroom, and power strain, especially on laptops. Also, avoid using USB hubs for your primary audio interface, as this can introduce further issues.
Latency, Buffer Size, and Monitoring: Virtual Instruments
In some cases, instrument plugins are particularly latency-sensitive, as the delay affects the timing of the sound being generated. Instruments like piano and drums start to feel unnatural with noticeable latency, as well as rhythmic synth parts, especially on multitimbral instruments with multiple layers in use.
For optimum low-latency MIDI performance:
- Try a buffer size of 64 samples or lower
- Reduce the amount of unnecessary CPU-heavy plugins
- Use CPU-friendly patches while tracking
Tip: In the initial composition phase, producers often use stock DAW plugins and then replace the sounds with more intensive plugins in the mix phase.
Latency, Buffer Size, and Monitoring: Finding The Balance
When it comes to latency, there isn’t a single perfect “one size fits all” setting. This is because every system has different CPU specs, a different audio interface, and a unique workflow with its own set of plugins.
The idea is to balance:
- Ensure the latency is sufficiently low to perform comfortably
- Stable enough to avoid glitching
A pro engineer will adjust their settings as the recording session progresses. Using a stable 128-sample buffer size is more effective than trying to push your system beyond its limits, simply for the sake of low latency.
By understanding the relationships between latency, buffer size, and monitoring, you can optimize your system and troubleshoot issues quickly for a more professional recording workflow.

More Info:
*Note: This article contains affiliate links that help us keep Gearnews running. The price for you always stays the same! If you buy something through these links, we receive a small commission. Thanks for your support!


This might also interest you