The 10 most common Equalizer Mistakes
 4,5 / 5,0 |

What are the most common mistakes that people make while using an equalizer? What’s the correct way to use an EQ, and how can you use it to your advantage to make sure that your mix sounds the way you want? In this tutorial, we’ll show you the 10 most common (and avoidable) mistakes that beginners often make while using EQs and filters.
Note: This article was originally published in German on bonedo.de.
These are some of the topics we’ll cover:
- How to suppress annoying frequencies
- How to bring out an instrument in the mix
- Different types of equalizers
- Which type of EQ is best for which application?
- What do the controls of an EQ do?
What is an equalizer?
Simply speaking, an equalizer (abbreviated as “EQ”) controls the “volume” of certain frequency ranges like treble, mids, or bass. It’s one of the most important tools in music production and mixing, and it also plays a role in music consumption. That’s why you’ll also find equalizers on your home stereo system and maybe even in your smartphone’s music player app. That said, we’ll focus on the use of EQs in music production and mixing.
Equalizer mistake #1: You’re not familiar with the different types of EQs
Looking at a channel strip on a mixing desk or a typical EQ plug-in, you’ll come across various types of EQ controls. Besides a high pass filter and one or more parametric mid bands, you’ll often find two shelving equalizers for the high and low frequencies. To get the most out of your EQ, it’s important to know the differences.
Let’s look at a typical parametric EQ plug-in. The first band (usually at the top or on the left) is a high pass filter (or low cut filter). It removes the frequencies below the cutoff frequency, which is often around 80 Hz in common studio applications. One of its purposes is to remove low-end rumble and mechanical noises (e.g. footsteps) that could otherwise end up on the recording. For instruments that don’t contain any important frequencies below 80 Hz, it’s a good idea to use a high pass filter by default. Examples: vocals, speech, most guitars, snare drum.
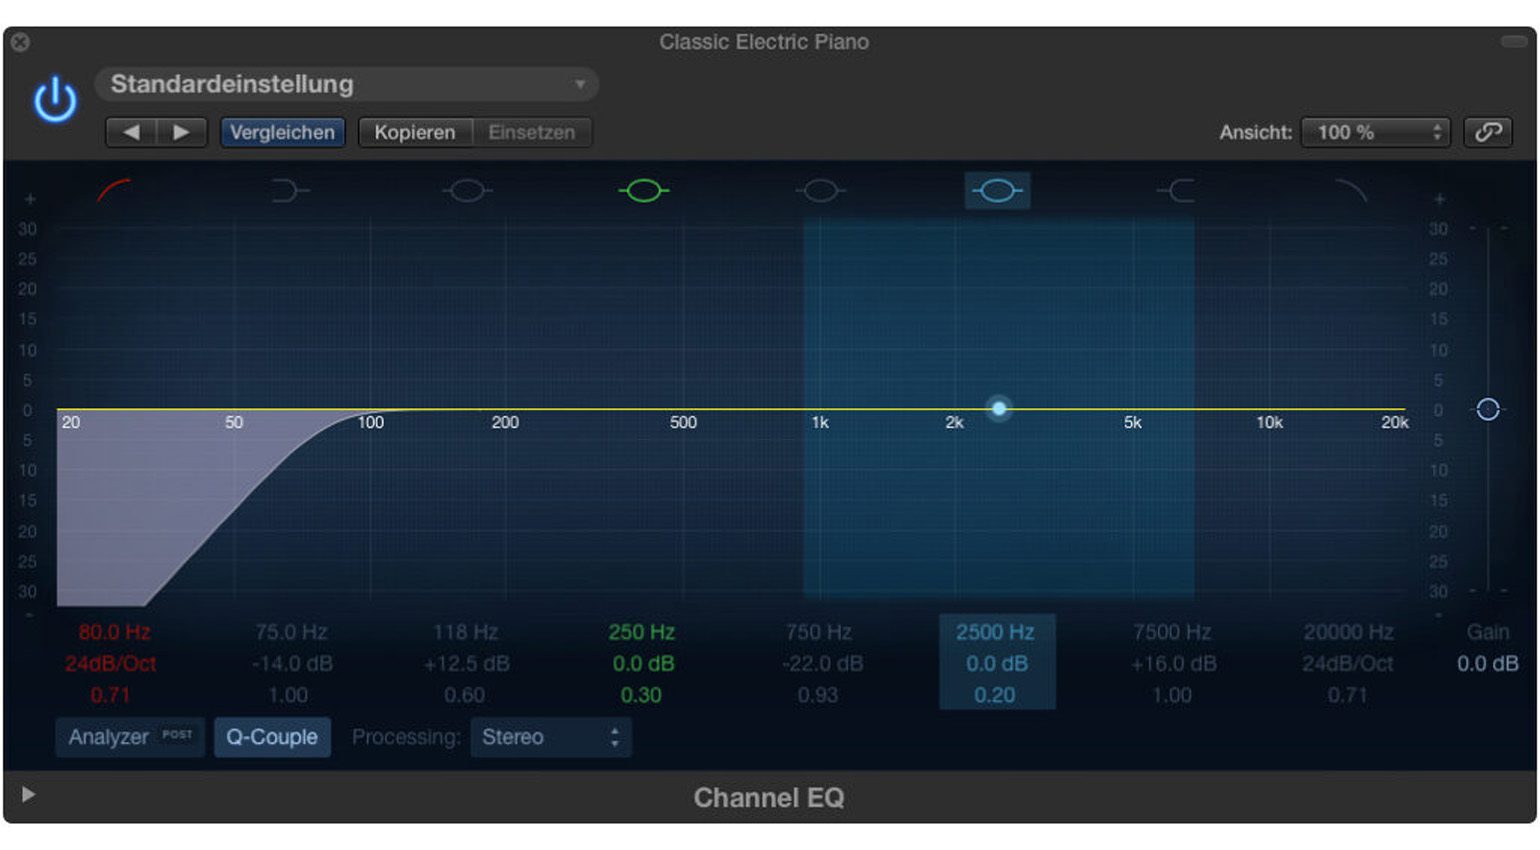
Low cut filter · Source: Bonedo
Parametric EQ
Another type of EQ band that you’ll find on most mixing desks and in most EQ plug-ins is the parametric mid band (bell EQ). A fully parametric mid band has three controls: center frequency, gain (cut/boost), and Q factor (bandwidth). Use the frequency knob to dial in the frequency that you’d like to boost or cut. The gain knob controls the amount of boost or cut. The Q knob controls the bandwidth: the range of frequencies around the center frequency that the EQ will affect. A lower Q factor (quality factor) results in a wider bandwidth, while a high Q factor yields a narrow bandwidth.
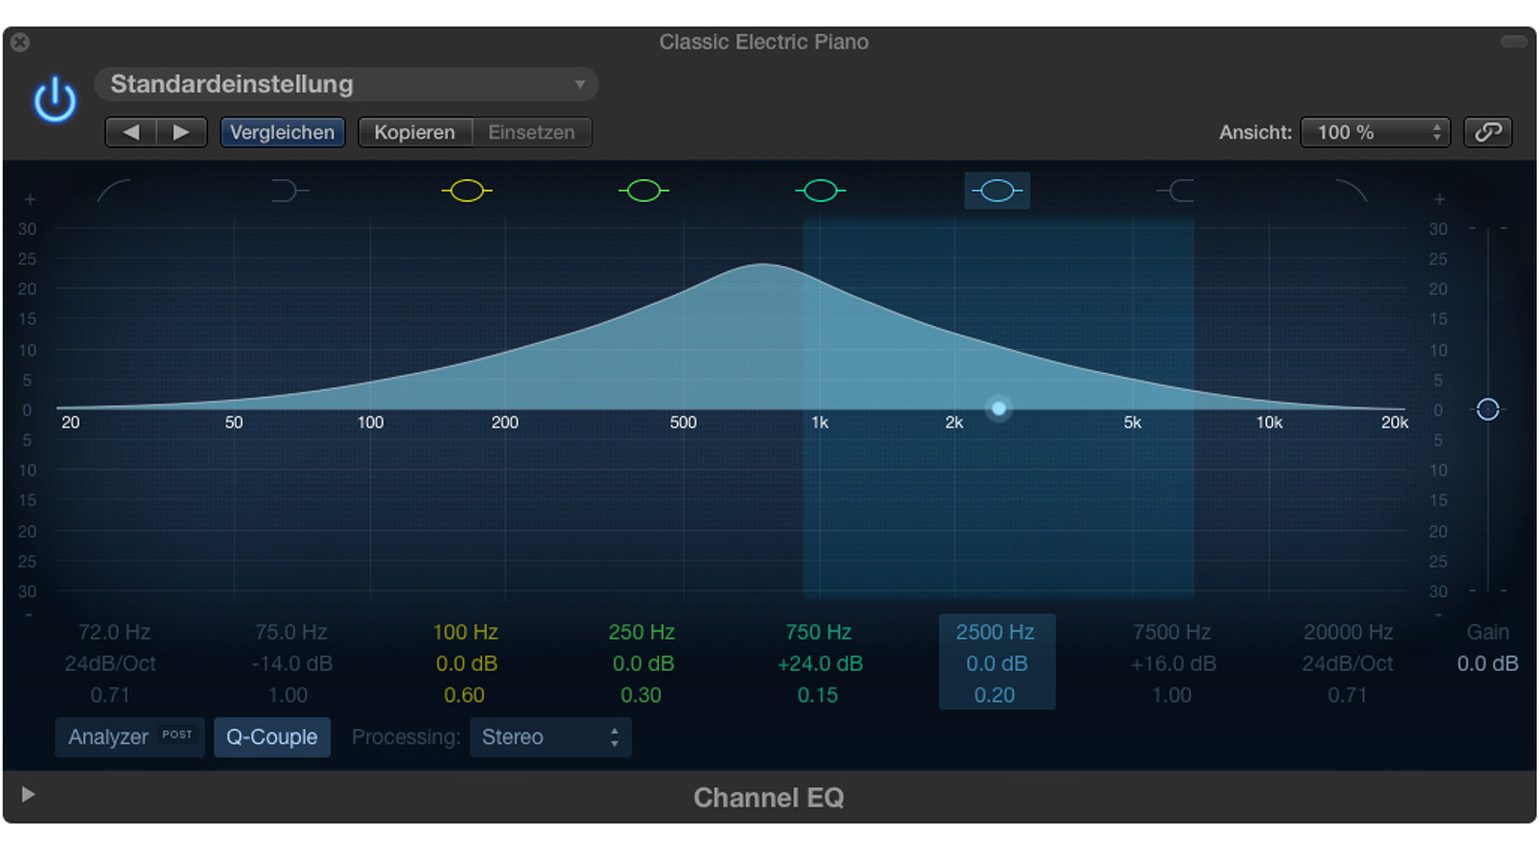
Fully parametric mid bands are often used to target specific frequencies and attenuate them; they allow you to perform “surgical operations” on the frequency spectrum. Variants that lack a Q control are called semi-parametric. The following screenshots show parametric mid bands with wide and narrow bandwidths.
-

- Parametric mid band (low Q, boost) · Source: Bonedo
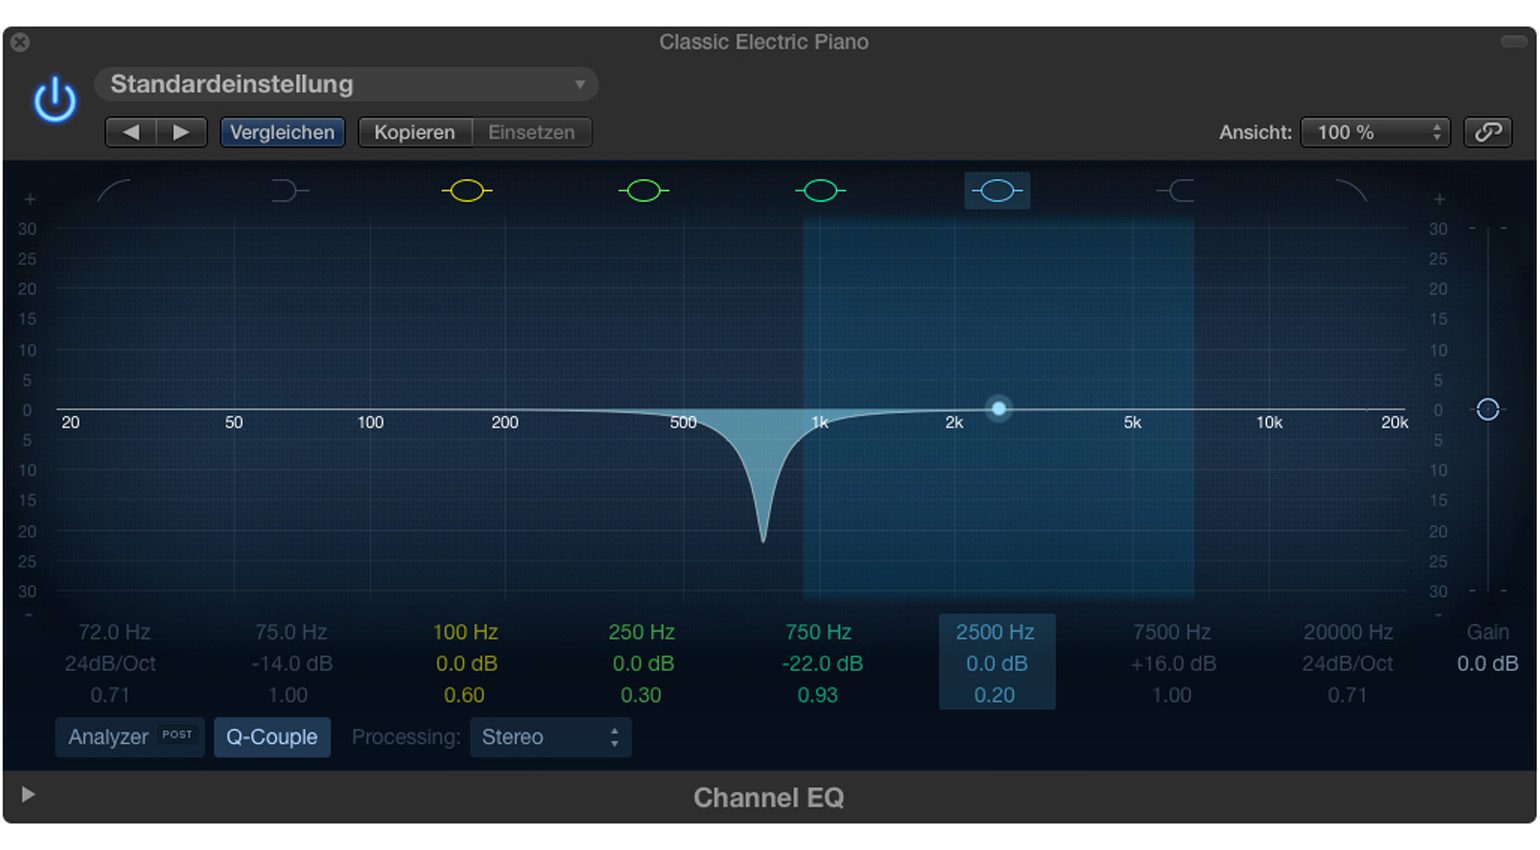
-
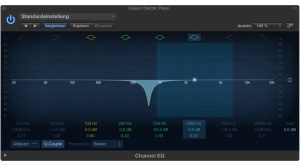
- Parametric mid band (high Q, cut) · Source: Bonedo
Besides filters and parametric EQs, the third type of equalizer that you’ll commonly find in a mixer’s channel strip is the shelving EQ. In contrast to a parametric bell EQ, a shelving EQ affects all frequencies above or below a certain frequency. On smaller analog mixing consoles and consumer equipment, the frequencies are often fixed, with 80 Hz being a typical value for a low shelf and 12 kHz for a high shelf. More sophisticated equalizers allow you to adjust them within a certain range.
Compared to a parametric mid band, a shelving band is a rather coarse tool. That’s why it isn’t ideal for targeting specific, troublesome frequencies. Instead, it lends itself to wide-band “sweetening” – polishing the overall sound by boosting characteristic frequency ranges. For example, you can make vocals shine by applying a bit of high-end boost using a shelving EQ.
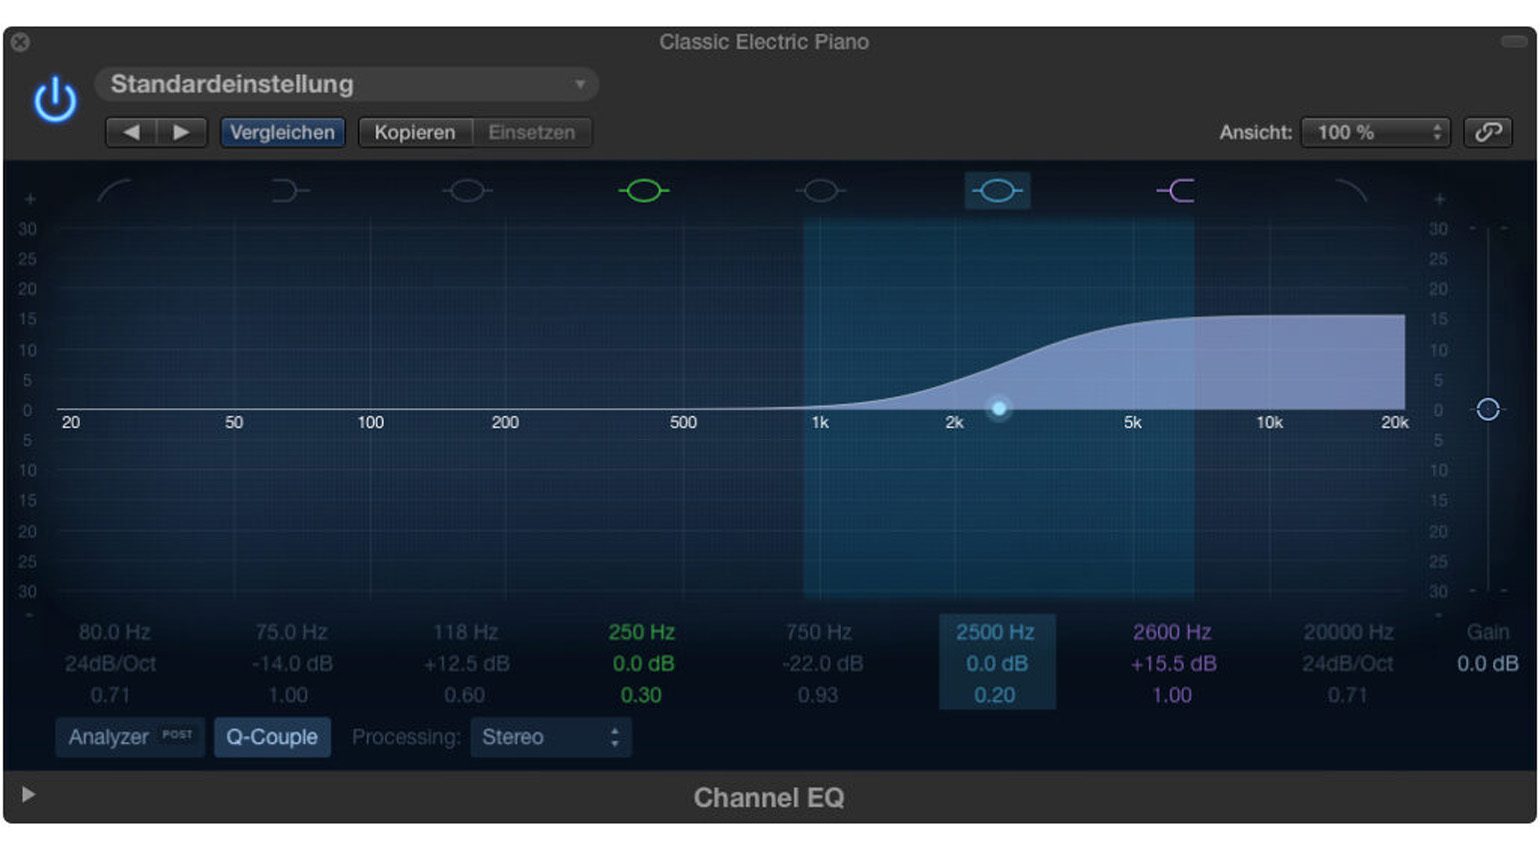
High shelf · Source: Bonedo
Equalizer mistake #2: You don’t eliminate troublesome resonant frequencies
A common beginner’s mistake is the attempt to improve the sound and expression of vocals or instruments by boosting many different frequencies. While this approach does occasionally deliver the desired results, it’s much more important to find and attenuate resonant frequencies. Every musical instrument and microphone has certain resonant frequencies, which can be detrimental to the overall sound. Furthermore, resonances can build up a lot of energy and mask important components of the useful signal. That’s why it’s important to find troublesome resonances in your audio signals and attenuate them using an equalizer.
To find them, solo the channel first. Then, turn the gain knob of a parametric mid band up to about 6 to 10 dB of boost, and choose a rather narrow bandwidth (high Q). Now you can use the frequency knob to sweep through the frequency spectrum while listening carefully. When you’ve found a spot where it sounds especially booming or piercing, chances are that you’ve discovered a resonance, which you can now attenuate. In many cases, about 3 to 6 dB of cut is enough to tame the resonance while leaving the source signal intact.
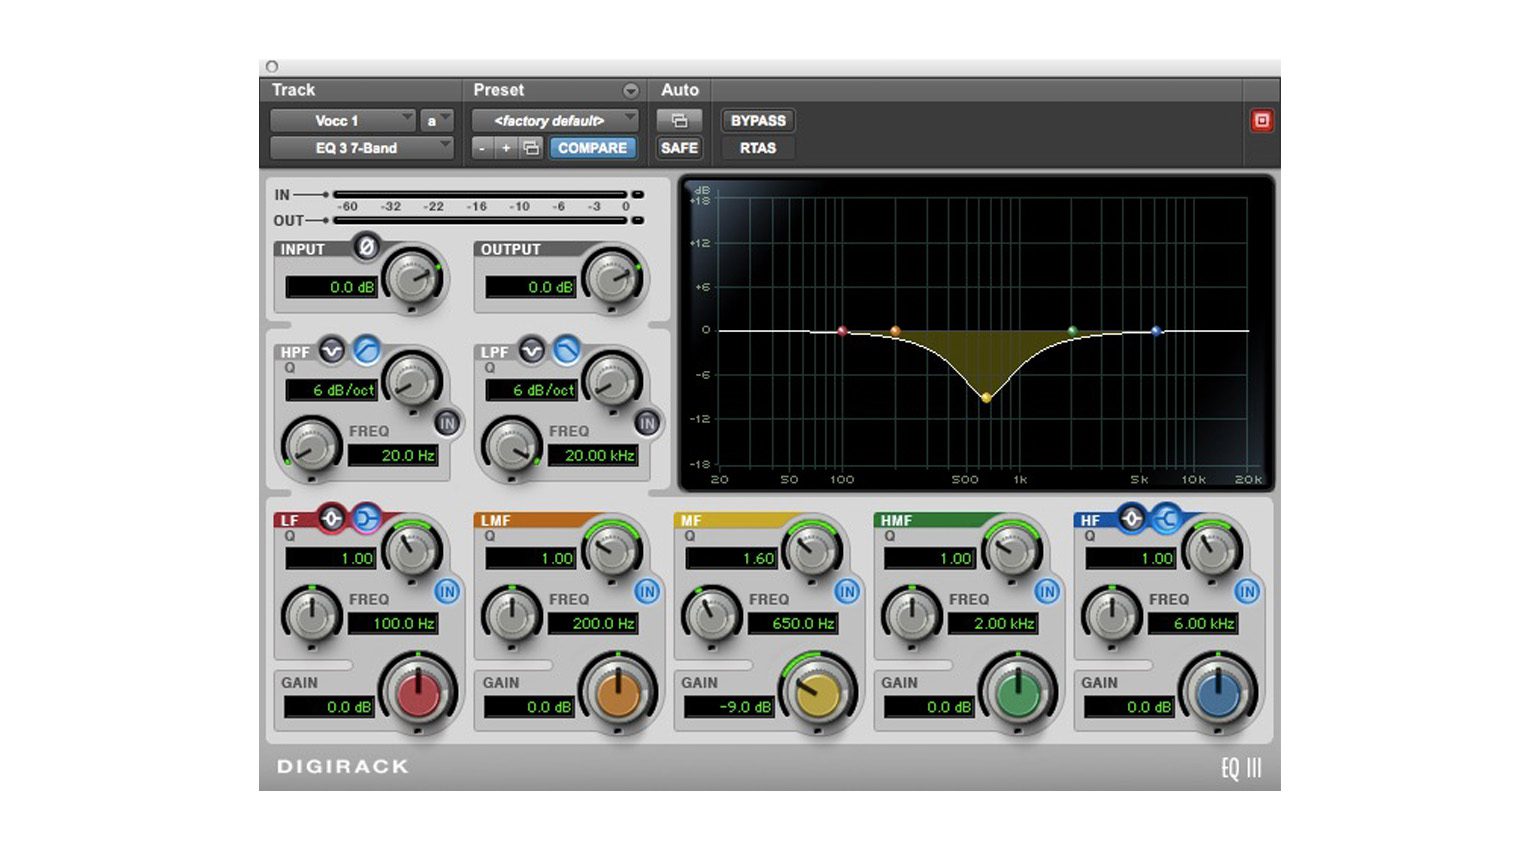
Fully parametric mid band with a 9 dB cut at 650 Hz and a Q factor of 1.6 · Source: Bonedo
Equalizer mistake #3: You’re boosting frequencies that mask other elements in the mix
When you boost the wrong frequencies, you can end up covering up other instruments in the mix. One of the best examples is synthesizer sounds and electric guitars. Both instruments fight for the listener’s attention and compete for the same frequency range in the middle of the spectrum. Let’s say we boost the high mids at about 2 to 4 kHz in the synth channel. While doing so will undoubtedly help the synth stand out, it can cover up the guitar or other instruments. Moreover, the synth can begin to sound harsh and piercing. That’s why your first step should be to achieve a transparent, well-balanced mix. And the easiest way to get there usually isn’t boosting what you want to hear, but rather attenuating what you don’t want to hear, as described above.
Equalizer mistake #4: You don’t pay attention to frequency spacing
Our ears are best at distinguishing natural sound sources if they come from different directions and sound differently. What happens in three dimensions in the natural world must be accomplished in only two dimensions in a stereo mix. You only have the stereo panorama and depth of field to work with.
This can be especially problematic with instruments like bass and bass drum, both of which are usually panned in the center and contain similar frequencies. The louder instrument tends to cover up the quieter one. Let’s assume that the bass drum has a resonance at 80 Hz and the bass has a characteristic frequency at 60 Hz. This would likely lead to a situation where neither instrument comes through clearly and the mix sounds muddy and undefined.
That’s why it’s a good idea to give each instrument its own separate space in the frequency spectrum. In our example, that could mean cutting the bass at 60 Hz and applying a slight boost at 50 Hz, for example. We could also attenuate the bass drum at 80 Hz and boost 100 Hz. This way, we’re creating some separation between the two instruments, which helps them to get along in the mix. But be careful – the aforementioned equalizer settings are just examples!
Typical frequency ranges of various instruments
The table below shows some characteristic frequencies for some important instruments. As a starting point, you could try to boost these while cutting other frequencies to make room for the other elements in the mix.
Ideally, your mix fills the frequency spectrum evenly, without any heavy emphasis in the bass, mid, or treble ranges. A spectrum analyzer can help to keep an eye on this. Another popular trick is to compare your mix with a reference track. This helps to spot imbalances, which are easy to get used to when all you’re listening to for hours is your own mix.
| Instrument | Frequency range |
|---|---|
| Vocals | 80 Hz to 12 kHz |
| Spoken voice, fundamental frequency (male) | 120 Hz |
| Spoken voice, fundamental frequency (female) | 240 Hz |
| Consonants | 1.6 to 6 kHz |
| Sibilance | 5 to 8 kHz |
| Bass drum (shell resonance) | 50 to 150 Hz |
| Bass drum (beater) | 1 to 4 kHz |
| Snare (sustain) | 80 to 500 Hz |
| Snare (wires) | Harmonics up to 12 kHz |
| Hi-hat | up to 15 kHz |
| Toms (sustain) | 70 to 120 Hz |
| Toms (attack) | up to 7 kHz |
| Cymbals | up to 20 kHz |
| Acoustic guitar (fundamentals) | 82 to 1174 Hz |
| Acoustic guitar (harmonics) | up to 12 kHz |
| Electric guitar, amped (fundamentals) | 82 to 1174 Hz |
| Electric guitar, amped (harmonics) | up to 7 kHz |
| Electric bass (4 string, fundamentals) | 41 to 343 Hz |
| Electric bass (4 string, harmonics) | up to 5 kHz |
Equalizer mistake #5: You overdo it
The equalizer was originally developed as a corrective tool for dealing with distortion introduced during the recording process, rather than as a sonic shaping tool. Sometimes it’s a good idea to remember this. Using too much EQ can easily make your mix worse instead of better. If your recorded tracks don’t sound good without equalization, they probably won’t sound much better when you EQ the living daylights out of them. That’s why it’s best to make sure your tracks sound great in the first place and use EQ sparingly. Otherwise, you risk taking away too much substance, which can sound unnatural.
That said, it’s absolutely possible to use EQs and filters deliberately as effects – the popular “telephone voice effect” with a strong boost between 300 Hz and 3 kHz is a good example of this. Similarly, a sweeping band pass filter with a steep slope can make a dull synth pad sound much more interesting. But this type of EQing is more of a sound design effect, rather than a mixing technique. If you find yourself having to reach for an EQ all the time, it’s probably time to go back and think about what might have gone wrong during recording.
Equalizer mistake #6: You over-emphasize the high frequencies
The vocals should be upfront in the mix, the guitar riff should cut through, and the snare needs to sound punchy. Simple – just turn up the high frequencies in all of them, right? Unfortunately, that’s probably a recipe for disaster.
Boosting the highs on vocal tracks also means boosting sibilant “S” sounds. If you overdo it, they can become annoying and you need to use a de-esser to fix it. Likewise, cymbals can sound very harsh with too much of a high-frequency boost, which can really throw your mix off balance. That’s why you should resist the temptation to boost the high frequencies in all of your tracks.
-

- Channel strips with semi-parametric … · Source: Bonedo
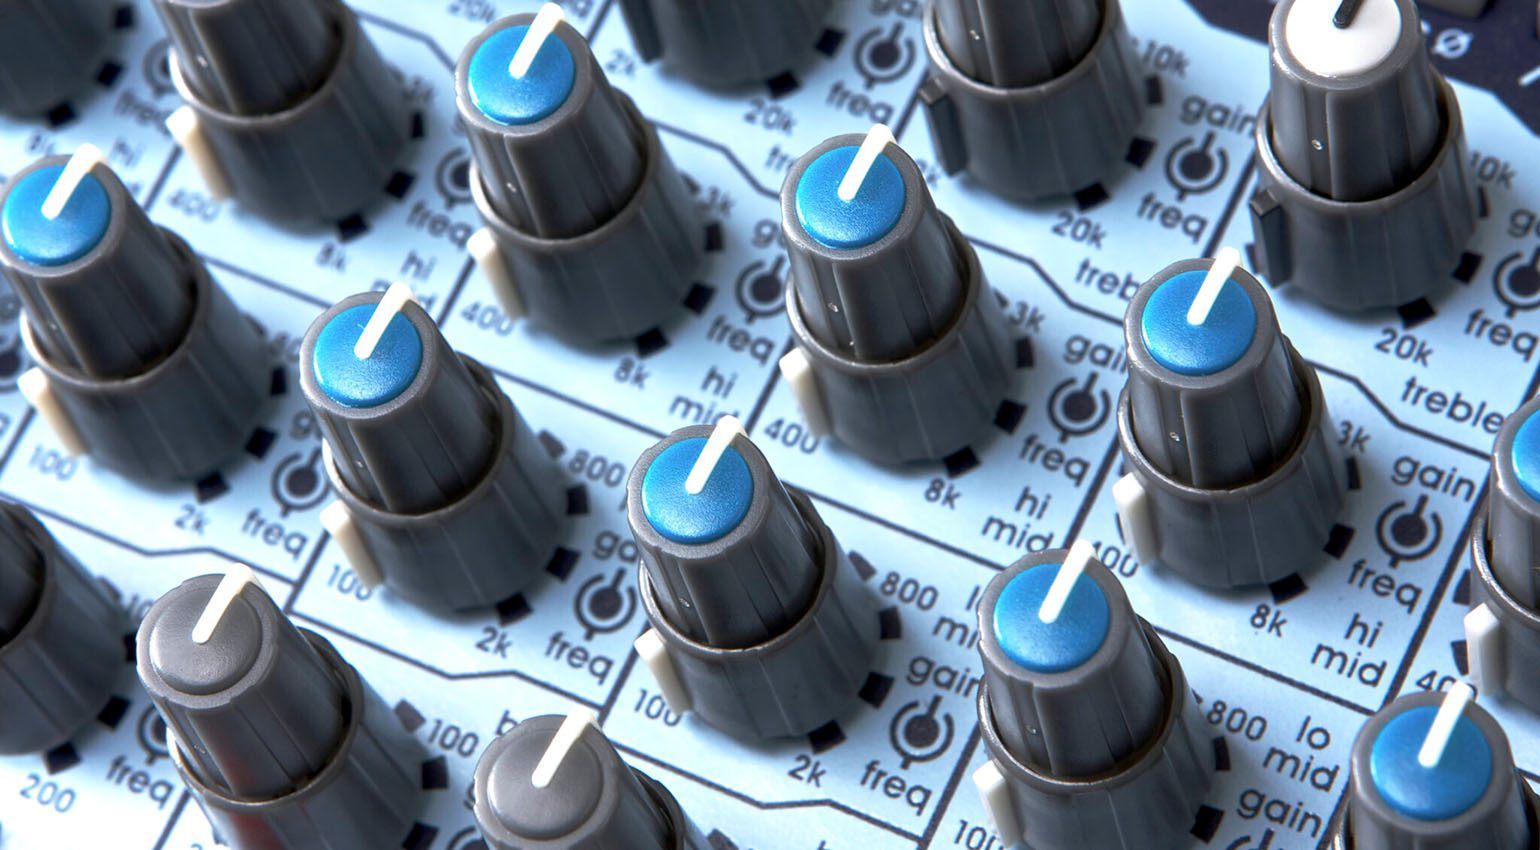
-
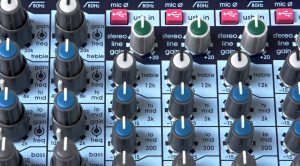
- … and fixed-frequency mids · Source: Bonedo

Equalizer mistake #7: You try to boost frequencies that don’t exist in the source signal
If you boost a bass drum at 12 kHz, chances are that nothing’s going to happen – certainly nothing that affects the sound of the bass drum. That’s because the instrument doesn’t produce any relevant content in this frequency range. An EQ can only boost frequencies that are already present in the source signal. Boosting other frequencies (like the highs in a bass drum) only gets you more noise and distortion, because all you’re doing is increasing the noise floor of the signal. You’re also wasting an EQ band that could be put to good use for something else.
Equalizer mistake #8: You use too much EQ during recording
Your microphone signals are the raw material for all further editing and mixing. The better the source material, the easier it is to get a good mix. When the vocals sound dull or the snare doesn’t slam, many beginners make the mistake to boost the highs during recording. Unfortunately, that doesn’t make the vocals or the snare any better – it only covers up the mistakes made during recording. That’s why it’s best to avoid using an EQ altogether during recording. If the sound doesn’t feel right, experiment with a different microphone or microphone position, rather than trying to fix it with an EQ.
That said, you can absolutely use a bit of corrective EQ during recording, such as a low cut to get rid of low-end rumble, or some subtle parametric EQ to attenuate annoying resonances. However, you should only do this if you’ve got a bit of experience and are absolutely certain that you won’t need those frequencies later. Remember: Once you’ve removed frequencies during recording, you can’t bring them back later in the mix! It’s generally better to reserve the EQ for later editing and mixing sessions, when you’ve got more time for precise adjustments. Recording sessions can be hectic and the focus should be on getting a great sound out of your microphones, rather than dealing with an EQ.
Equalizer mistake #9: You don’t use graphic equalizers correctly
Contrary to parametric EQs, graphic equalizers are mainly used for room compensation and feedback suppression in live sound applications. They’re less suitable for processing individual signals in the studio.
Graphic EQs are called “graphic” because they provide a quick visual representation of the overall EQ curve. A typical 1/3-octave EQ offers 31 frequency bands, each of which is equipped with its own cut/boost slider. In contrast to a parametric EQ, you cannot move the frequency bands to target specific frequencies. A common workaround is to adjust the surrounding bands, forming a small curve around the desired frequency.
A graphic EQ has another major disadvantage: Once it is inserted into the signal path, the signal always passes through 31 filter arrays, because the individual bands cannot be deactivated. Consequently, each band adds a little bit of noise, distortion, and possibly phase shifting, which can add up and end up in the overall signal.
Live sound engineers rely on graphic EQs for tuning the PA system to account for the characteristics of the room, or to prevent feedback in the monitor speakers. Due to the disadvantages mentioned above, they’re less suitable for recording and mixing.
Graphic equalizer · Source: Bonedo
Equalizer mistake #10: You rely too heavily on the visual representation of the EQ curve
Thanks to digital signal processing, modern EQs and EQ plug-ins offer many visual aids, such as built-in analyzers. While these digital perks are convenient, they also have a drawback: They can cause you to use your eyes rather than your ears.
Needless to say, the graphical representation of the EQ curve in modern DAWs and digital mixers is very useful. Things like the bandwidth of a parametric EQ or the effect of a shelving EQ are easy to spot. However, many users tend to rely too heavily on these visual aids and forget about what matters the most: the sound! Moreover, the display doesn’t always correspond exactly to the acoustic effect. That’s why it’s a good idea to take your eyes off the screen once in a while and concentrate on what you’re hearing – because that’s what really matters!
Further reading
Video tutorials
You are currently viewing a placeholder content from YouTube. To access the actual content, click the button below. Please note that doing so will share data with third-party providers.
You are currently viewing a placeholder content from YouTube. To access the actual content, click the button below. Please note that doing so will share data with third-party providers.
You are currently viewing a placeholder content from YouTube. To access the actual content, click the button below. Please note that doing so will share data with third-party providers.
You are currently viewing a placeholder content from YouTube. To access the actual content, click the button below. Please note that doing so will share data with third-party providers.


This might also interest you


5 responses to “The 10 most common Equalizer Mistakes”
You are currently viewing a placeholder content from Facebook. To access the actual content, click the button below. Please note that doing so will share data with third-party providers.
More InformationYou are currently viewing a placeholder content from Instagram. To access the actual content, click the button below. Please note that doing so will share data with third-party providers.
More InformationYou are currently viewing a placeholder content from X. To access the actual content, click the button below. Please note that doing so will share data with third-party providers.
More Information
Equalizer mistake #11 – you rely too heavily on conventional wisdom about equalizers.
“I tend to like things to sound sort of natural but I don’t care what it takes to make it sound like that. Some people get a very preconceived set of notions that you can’t do this or you can’t do that. Like Bruce Swedien (Michael Jackson’s engineer) said to me, he doesn’t care if you have to turn the knob around backwards; if it sounds good, it is good. Assuming that you have a reference point that you can trust, of course.”
—Allen Sides
True – just like the argument about presets vs custom patches, or analogue vs digital vs plug-ins!
If it sounds good, who cares how you got there 🙂
Nevertheless, this is an interesting article which I’ve bookmarked and will come back to, for sure.
The problem is most people who say “if it sounds good…” have no idea what actually sounds good to the majority of listeners, but only to themselves. “If it sounds good” means nothing unless you are a skilled and experienced mixer. Otherwise, it is just a foolish cliche splattered all over the internet by people too lazy to learn the craft.
100% truth. This type of coments is even more stupid when no one mentioned YOU NEED very good monitors and room to be able to hear. When i started i was trying to mix on something that is similar to bad gaming headphones of today. The task is just imposible on that. Just go to Behringer fun page on fb most people posting walls of synths have 3 inches speakers not even in the midle of the room and they call it „photo of my studio”. I wasnt talking to Michael Jacksons producer but am doing it more then half of my life all this article is pure gold use this solutions on your mixes and when you will start to hear in your head first what this track needs then you can start to experiment.
One thing i would like to add is that you only should use this solutions to solve the problem, do not Alpy enything by default. Only one thing you can use by thefault is 60 max 80 Hz high pass if your monitors cant reproduce this frequencys. Listen compare to similar tracks and then aply if you like resoults mixdown and go listen to it on every speaker you can find car iPhone headphones etc. sometimes smal speakers show you the lack of bass high freqs sometimes this strange car audio systems enhancers can show you problems with reverbs im telling you your job is to listen not to twist knobs. Your goal should be to make it sound aceptable on aceptable consumer gear not to make it sound good in the studio. Its much much harder task than that.
I really did like several of the pointers here. Appreciate the article.