
Mac file recovery and backups: Here’s what musicians need to know
How to recover lost files - and avoid losing data in the first place


Argh! That song you spent months on, that one-off recording session you were lucky to capture in your DAW, gone! Before you tear your hair out, here are a few tricks for successful Mac file recovery. And a few more for avoiding data loss in the future and keeping your Mac drive lean and tidy.
Recovering files on your Mac: Backup, Backup, Backup!
Before we get to the crisis situation when you have to recover data, let’s see how we can avoid getting there in the first place. We have lots of safety tools at our disposal these days. First and foremost, there’s one thing we have to be clear about: Backup your stuff. Do it regularly. And make it easy to find, in case you ever need to use the backup.
Time Machine
Mac users will no doubt have heard of Time Machine, Apple’s built-in backup system. Here you need some space to make a copy of all your data, such as an external USB hard drive. Plug in a drive, turn on Time Machine and set it to run automatically. It will make a copy of all your data, system files and software packages. Lost any files? Time Machine can access the backup drive to recover them. Of course, Time Machine can only save you if you remembered to use it!
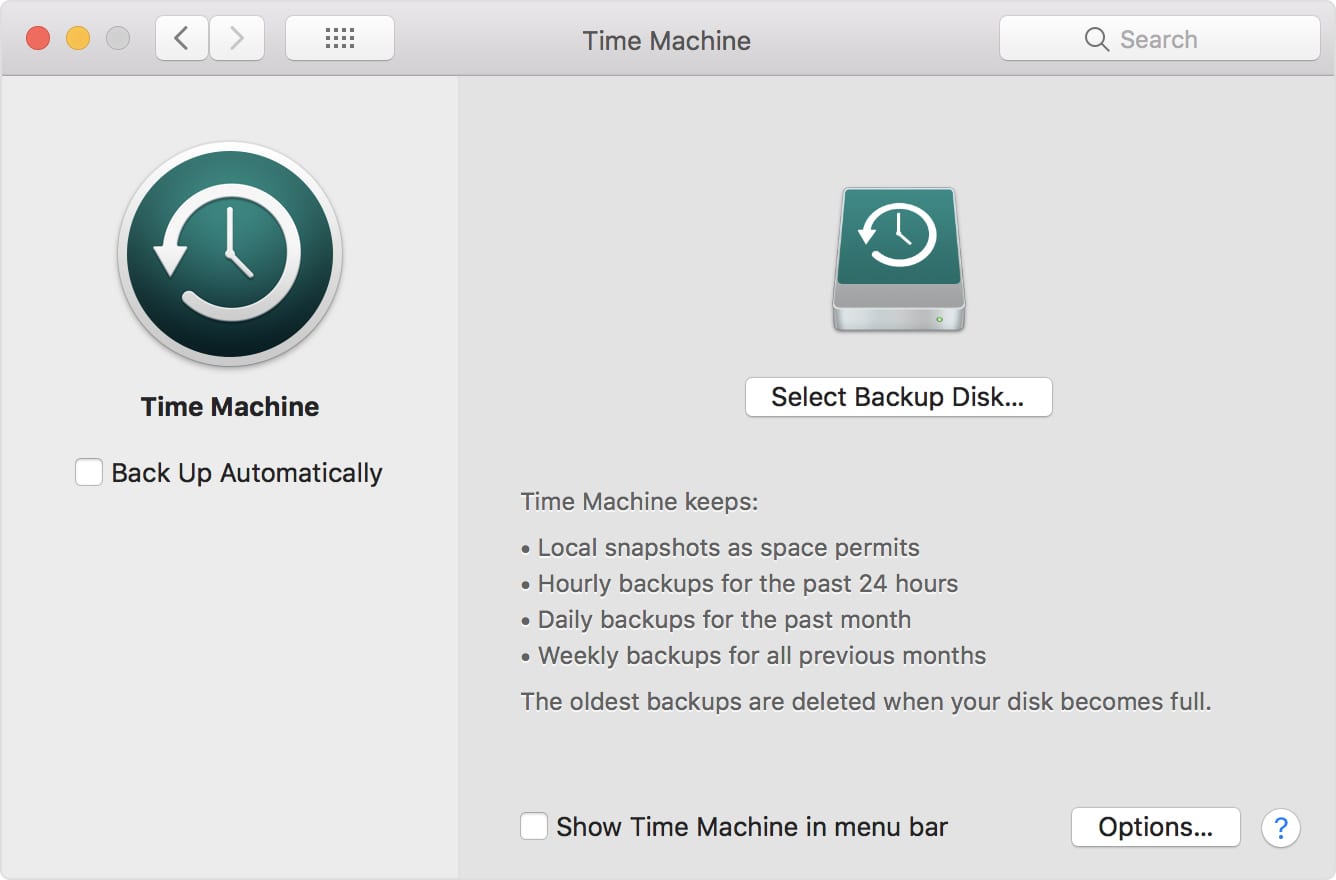
Apple’s Time Machine can save you a lot of trouble · Source: Apple
Carbon Copy Cloner
Time Machine is a basic file recovery system with limitations in how you can organise your backed up data. There are good alternatives out there. My personal favourite back up system is Carbon Copy Cloner. This utility give you more control of your data backups and lets you clone a whole system. Carbon Copy Cloner is third party software, so it’s not free. In this article I’m going to stick with the free and built-in Mac applications and system utilities for getting your Mac back up and running. Try the 30-day demo of Carbon Copy Cloner here:
Mac Recovery Mode
If you have to recover files, an important tool at our disposal is a in-built Apple system called Mac Recovery Mode. This has been part of the operating system since OS X 10.7 Lion, released in 2010. This handy Recovery HD partition contains the latest version of the macOS you have installed on your Mac and so it makes it possible to help get your system up and running by troubleshooting some basic problems.
This set of tools is accessed by holding down the Command and R keys on your keyboard, as your Mac reboots/starts up. The Command key is the one on either side of your spacebar and it doesn’t matter which one you hold down, as long as you hold it at same time as the R key. Your Mac may take a while to turn back on, but once it finally gets there, you will be presented with the Recovery Mode macOS Utilities screen, as shown below.
You’re presented with four options to choose from.
- Restore from a Time Machine backup – This one gets your data back from your backup drive
- Reinstall macOS – This will allow you to reinstall your macOS
- Get Help Online – Takes you to Apple’s support web pages via Safari web browser
- Disk Utility – This will attempt to verify and repair connected hard drives.
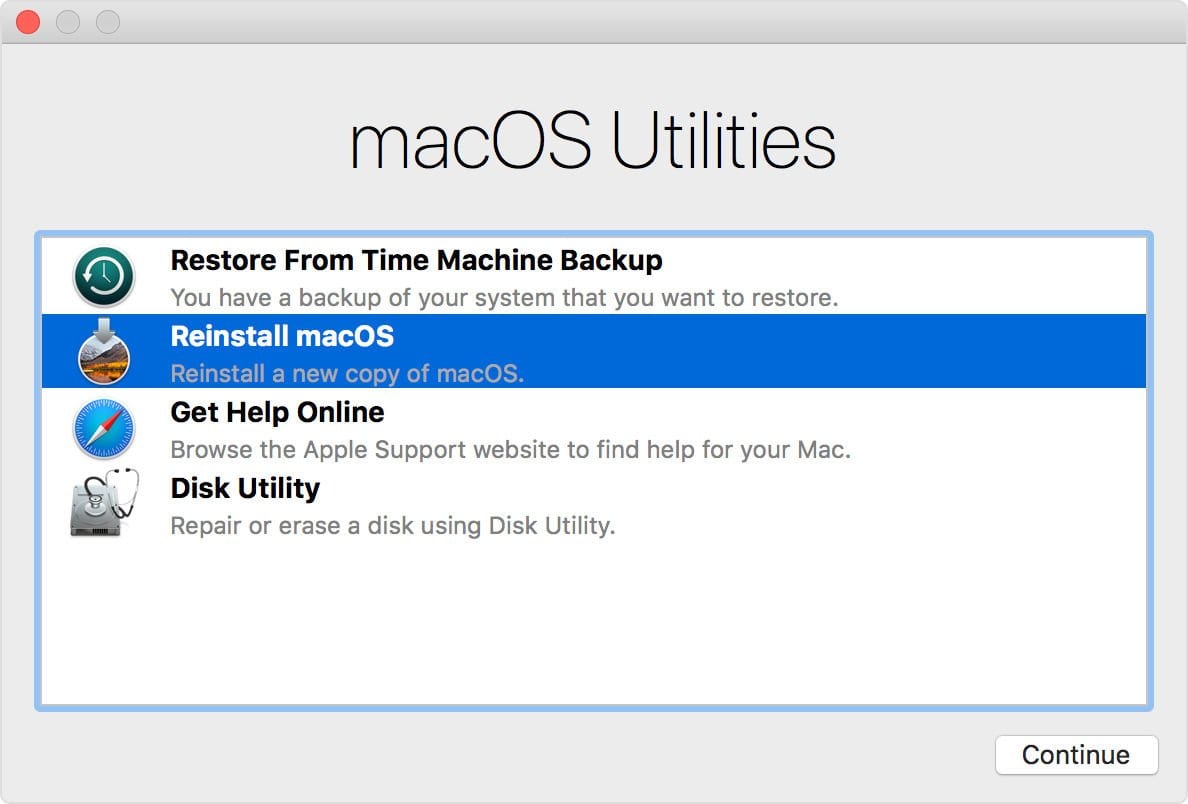
Hold down the Command & R keys as your Mac boots up for access to the Recovery Mode utilities · Source: Jef Stone
Restore your whole system from a Time Machine backup
The first option is the easiest one to perform. Plug in your Time Machine backup hard drive and follow the onscreen instructions. This will restore your last backup to your Mac, letting you recover all your lost data, software and settings. Choose a Time Machine backup from before the problems started and click on Continue. The tool will then overwrite your whole system and replace it with the backup version.
Recover a file from a Time Machine backup
Sometimes you just need a single file. You may have an earlier version of a file that’s more useful to you. Or perhaps you accidentally deleted the file you need. If so, you can use Time Machine without rebooting to macOS Utilities.
Open your Time Machine application by clicking on the icon either in the menu bar or dock, or by searching for Time Machine using Spotlight. You do this by holding down the Command key and the space bar and typing Time Machine into the box that appears on your screen.
Now you can find the missing files you want to restore using the onscreen up and down arrows. When you find the file you want, you just press Space Bar to preview it to make sure it’s the one you’re looking for. Click on Restore to recover the selected file.
Keep your hard drive healthy
The Disk Utility option can be used to verify and repair damaged data sections on your hard drives. Sometimes, this is all you need to get your Mac up and running smoothly again. Inside the Disk Utility application you will find an option called First Aid. This will attempt to repair any damaged files. I recommend trying this first. But be warned: if your hard drive is physically damaged, then First Aid probably won’t be able to save your data.
Although it can repair damaged hard drive sectors, it can’t recover lost files. But Disk Utility is useful for keeping your hard disk in good condition. If your Mac is feeling sluggish, it doesn’t hurt to run it every so often to help keep your data intact.
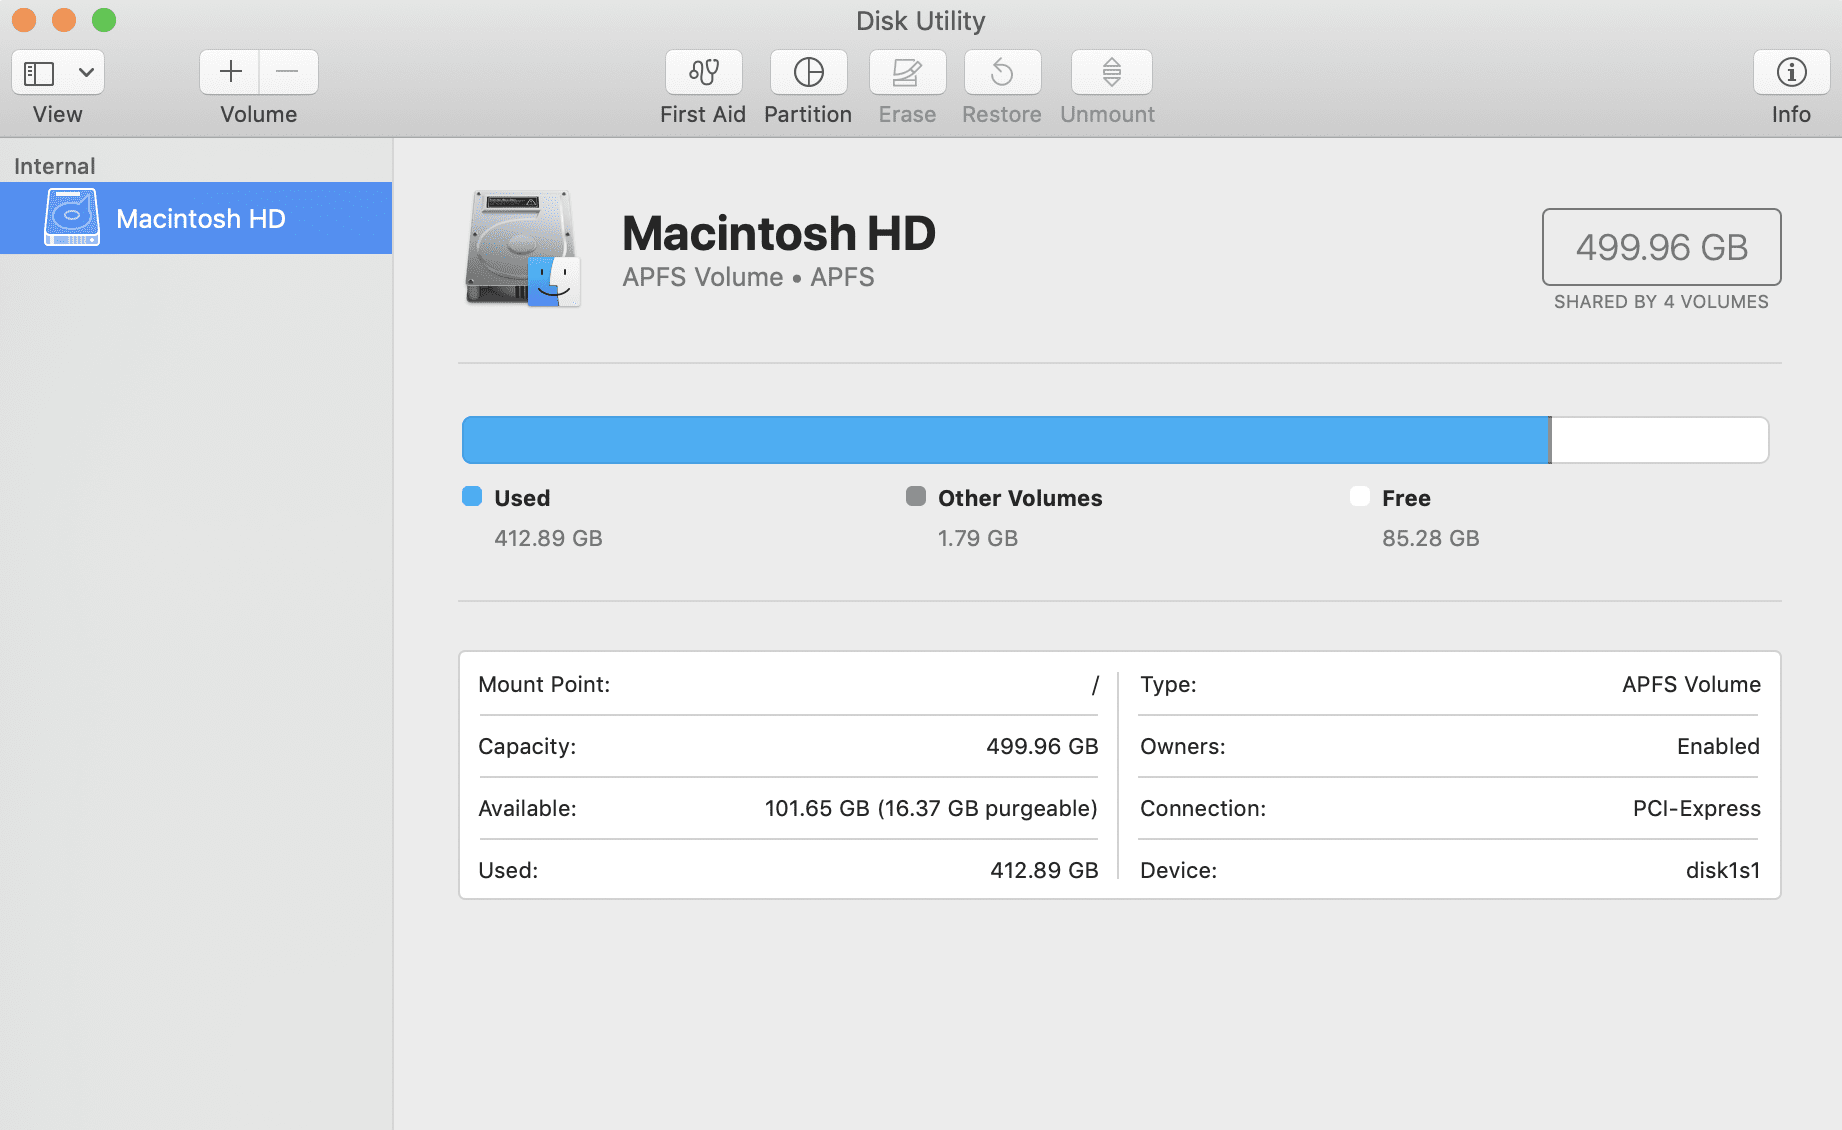
Apple’s Disk Utility application · Source: Jef Stone
Other more advanced options to consider
Keep your Mac clean and healthy to help avoid losing any data. Use the inbuilt application Terminal to run health checks, recover files and repair some damage. You can access Terminal on your Mac in the Utilities folder, or you can just do a Spotlight search for it. You can also access it within Recovery Mode.
When in the Mac Recovery Mode screen you will also find access to some more advanced options at the top of your screen. These are under the File, Edit, Utilities and Window tabs. You will find the Terminal application here under the Utilities heading in the menu.
Terminal gives your access to the Unix ‘back end’ of your Mac’s operating system. It’s a powerful tool, and can feel a bit scary for many users. But it can get you out of a pickle so it’s worth knowing how to use it. Terminal is very straightforward, you just type a command on the command-line and then press Return to execute it.
Here’s how to access Terminal whilst you are in macOS Recovery:
- Start up in Recovery Mode as above.
- Click on Utilities in the menu bar.
- Click on Terminal.
Once you have a Terminal window open, type commands and run them. There is a wealth of useful things you can do using this tool. In fact, there are whole websites dedicated to useful commands you can use. Here are a few to check out.
- Useful Terminal Commands to Recover files
- How To Use Terminal on a Mac
- Terminal Tips & Tricks
- 40 Terminal Tips & Tricks
OnyX
If Terminal looks a bit too advanced for you, I recommend using a tool like Titanium Software’s OnyX. This free software utility has a simple user interface and runs a lot of useful tools to keep your Mac system clean and tidy. OnyX helps you avoid future issues and prevent data loss. It won’t actually recover your files, but it will help keep your Mac healthy and running smoothly.
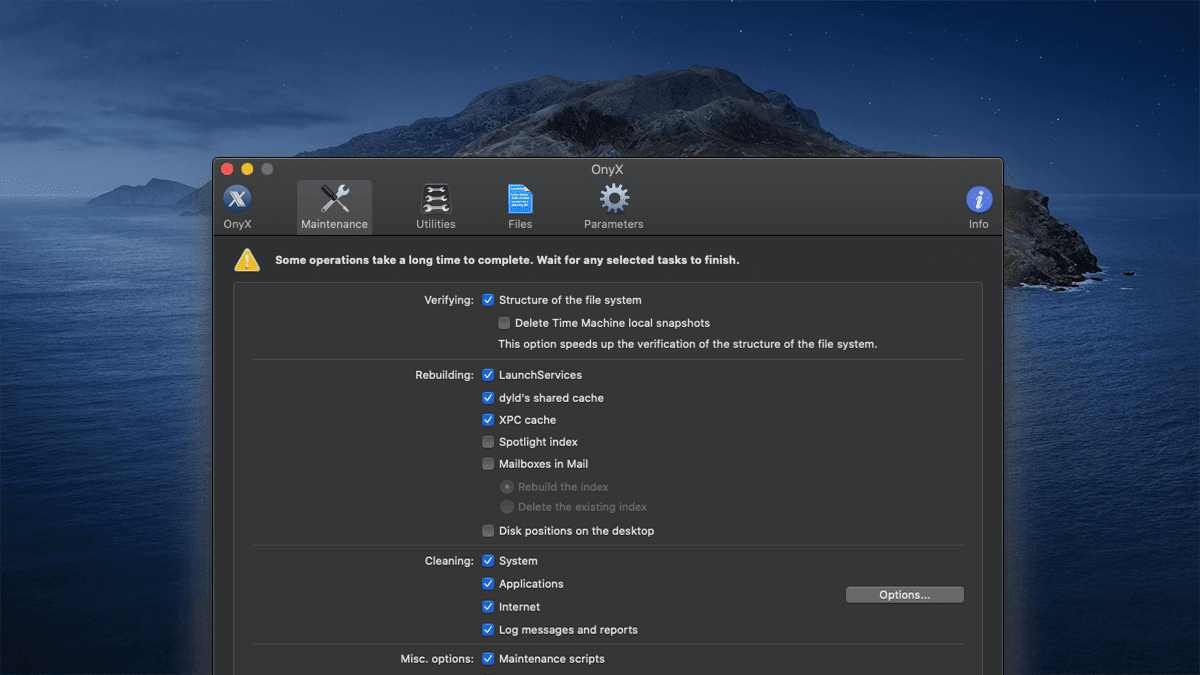
OnyX is neat way to keep your Mac in great shape · Source: Titanium Software
Apple Support
One last tip for all Mac users: Apple Support. Contact them via the Apple website, or by going to About This Mac from the Apple logo in the top left of your Mac screen and clicking on Support. If you own an iPhone or an iPad you can even download a free app called Apple Support to request a free phone call or live chat within the app itself, anywhere in the world. Neat.

The free to download Apple Support app for iPhone and iPad · Source: Apple
If you’re really stuck, the Apple Support team can help. They have all the relevant support documents, tools and information at their disposal. Often, the support team will use the Apple tools mentioned in this article. If you need someone to guide you through using any of these, contact them and they will try to help you out.
A last reminder: backup you data! If you use Time Machine or an application like Carbon Copy Cloner regularly, you have nothing to fear. If you haven’t done a backup in a while (or ever), go make one. Now.
More Information on Mac File Recovery


This might also interest you