Recording guitars at home: Top tips for better tones
 5,0 / 5,0 |

Many of us musicians are currently stuck at home. If you’re a guitarist, this is a great opportunity to spend some more time practising – and honing your recording skills! If you’re looking to take your first steps tracking some guitars at home, here are some simple tips for a great guitar recording set-up.
Recording guitars at home
If you have a great riff or song ideas that you want to get down somewhere so that you don’t lose them, recording your guitar is the best way to build up a body of work. In this article I am going to give you a few simple ideas to help you get a good guitar tone. I will also add some links to free recording software for those of you on a shoestring budget.
Audio Interface
Unless you’re using your laptop’s built-in mic or a USB mic, you’ll need to plug in your microphone’s XLR cable somewhere to send the signal through to your computer. The Focusrite Scarlet Solo* or the Presonus AudioBox iOne* should do the job just fine. If you have more of a budget, you can try the Apogee ONE*. You really can’t go wrong with modern audio interfaces, as long as you have a minimum of one XLR input and one 1/4″ instrument cable input.
Headphones
I would, wherever possible, recommend you monitor on headphones, as this is what your DAW (Digital Audio Workstation, or recording software) or old vintage four-track tape machine is picking up. If you are looking for a set of decent headphones, I can recommend the Audio-Technica ATH-M50x * or the Sony MDR7506 *, as both are great all-round pairs for monitoring when recording. I myself have been using a pair of Sennheiser HD-25 * for over 20 years now, and would say they are also worth checking out.
Microphones
There are many opinions on which microphones you should use for recording electric and acoustic guitars. My advice is to use what you have and don’t be afraid to experiment with microphone technique. Whether you opt to use dynamic microphones such as the classic Shure SM57 LC * or a Sennheiser E609 *, or even a high end ribbon mic like the Royer 121 *, at the end of the day, it’s all about microphone placement. I’ve used cheap £20 microphones to get great results, just by placing them well and using the room and guitar amp speaker to my advantage.
Recording Amp/Cab Speakers and mic technique
There are countless books and resources – as well as heated debates – on this topic. Basically, it boils down to three variables.
- Point of the speaker cone that the mic is pointing at
- Distance of the mic to the speaker cone
- On/off axis
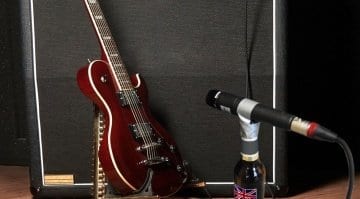
You should start off by placing the mic directly in front of the middle of the speaker, pointed towards it at a 90-degree angle. The closer you are to this position, the brighter and more present the recording will sound. Moving the mic toward the outside edge of the speaker (keeping the 90-degree angle) will make the sound darker and more bass heavy when recorded.
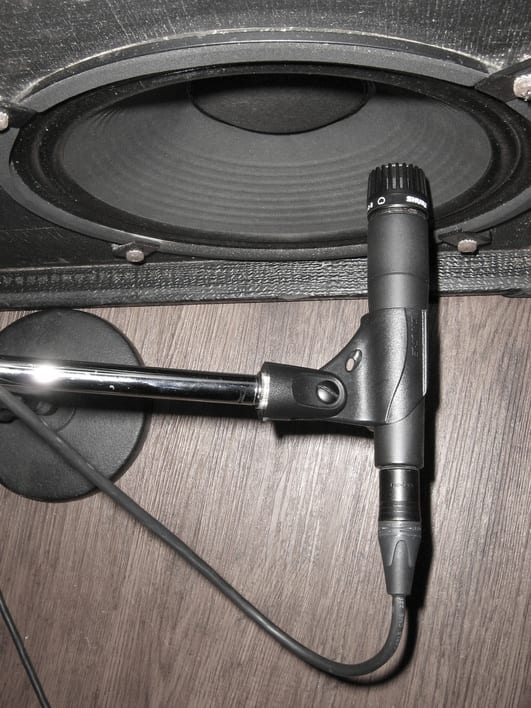
Microphone placed halfway between the speaker cone and edge · Source: bonedo.de
The closer the microphone is to the speaker, the more direct and immediate the sound will be when you record it. But take this into consideration: the louder the source, the more chance you may experience what is known as proximity effect. This can overload your microphone or lead to a build-up of low frequencies. In this case, you will either need to move your microphone away from the speaker to avoid overloading, or use EQ to resolve the boomy low frequencies.
The third variable is the axis. On-axis means you are pointing your microphone directly at the speaker cone at a 90-degree angle. This will sound brighter and more direct. But you can also angle the mic (take it “off-axis”) towards another part of the speaker to get a different sound. This should roll off the high end roll a touch and make things sound a little smoother.
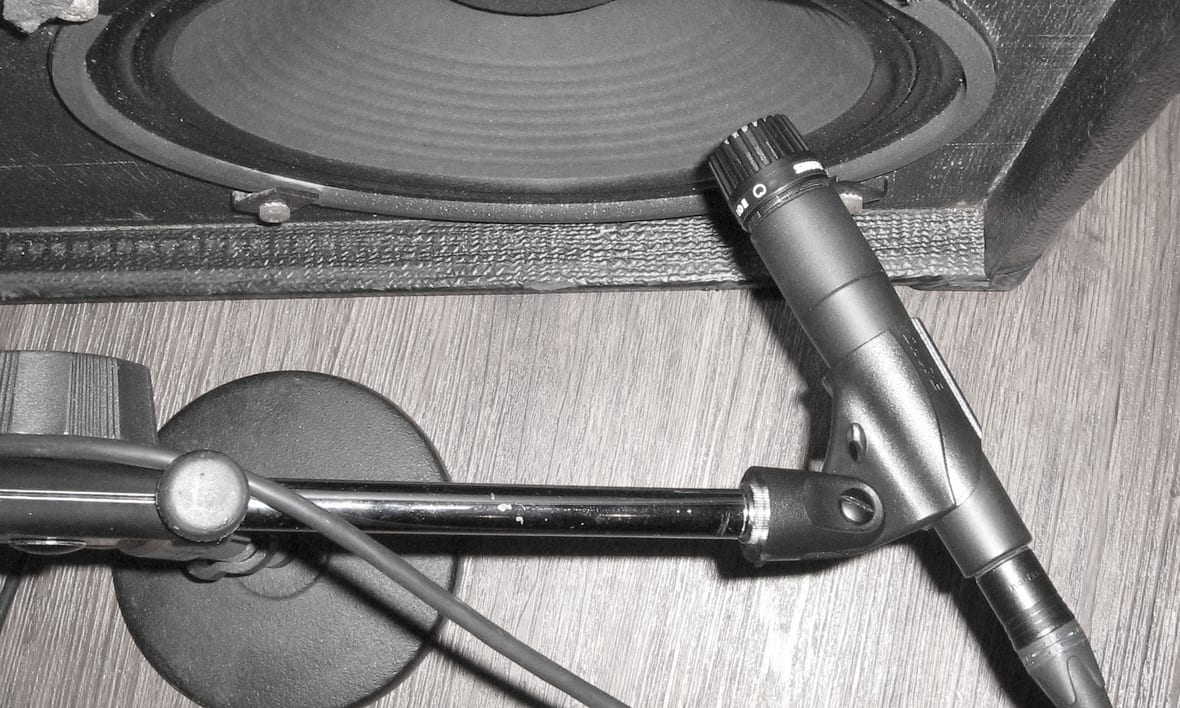
Microphone placed at an angle · Source: bonedo.de
There are no rules. Play around with different distances and microphone placements and see what you like best.
Where in the home to record?
You can use the different aspects of your home to enhance your recorded guitar tone. Look for rooms with hard surfaces like your bathroom or kitchen for lots of tight reverbs/echoes. These can be a nightmare if you want a tight sound, but can also be great for adding a touch of echo’d weirdness here and there.
Hallways and stairs can also give you an opportunity to experiment with larger spaces, and therefore bigger echoes. I would recommend placing your microphones at the opposite end of your hallway or at the top of the stairs, with your amp situated downstairs, for example. This way, you can attempt to generate some massive guitar tones by using your space creatively.
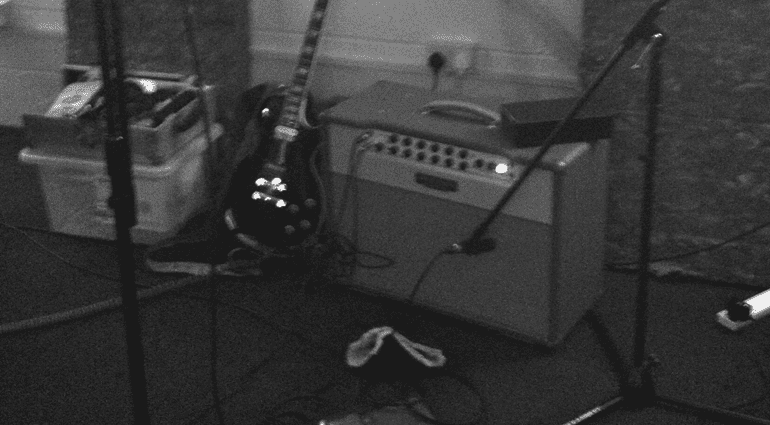
Recording guitar on a budget · Source: Jef
Faking an Isolation Cab
An Isolation Cab is an enclosure that surrounds the speaker and microphone, allowing you to crank your amp and record without excessive volume. When faking an Isolation Cab, you’ll need to use a set of headphones to monitor what the microphone is picking up. Don’t rely on what your ears are hearing outside the room/bucket etc. Monitoring via headphones will give you a true representation of what the microphone is actually recording.
Tight Spaces
In the past, I have used cupboards, wardrobes and even buckets as home-made Isolation Cabs to get a tight electric guitar sound. Take your guitar amp, ideally a small wattage amp or even something as simple as the Marshall MS-2 * battery powered mini amp and place it in the tight space. Then stuff the area with either pillows or soft furnishings, drop a microphone in the vicinity of the front of the amp and then use the pillows to both hold the mic in place and to muffle the amp’s tone. This is certainly a more ‘experimental’ way of creating your own Isolation Cab, but it can yield amazing results with a bit of practise.
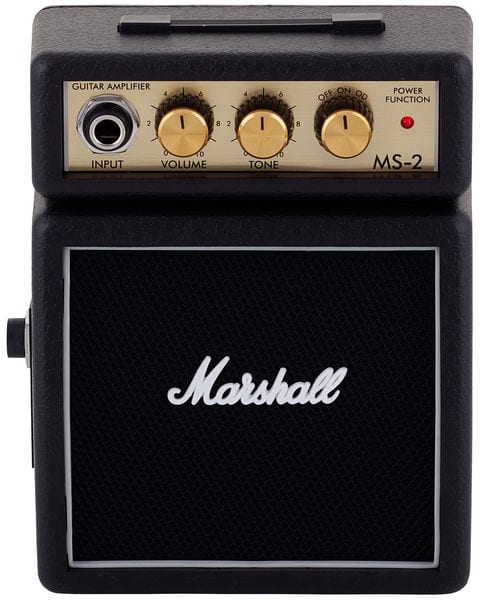
Marshall MS-2 · Source: Thomann
The Tunnel
This one is a lot more experimental and I have used it to good effect many times over the years, especially with distorted electric guitars. You need to make a long tunnel using hard surfaces, to create a long, enclosed tight space. Think along the lines of two pieces of hardboard, or perhaps use a wall and lean one piece of wood against it.
Then, place your guitar amp at one end and your microphone at the other end of the tunnel. If done correctly, you get quite the mini-canyon effect, and the longer your tunnel, the bigger your mini-canyon!
Recording acoustic guitars
When it comes to recording acoustic guitars, you really do need to use the space around you. If the room is too full of soft furnishings, your recorded guitar sound can lose a lot of its liveliness. However, if the room is too hard and bright, then introducing softer materials will help calm it down a bit, incase it all gets too harsh.
Too hard, too soft?
Ideally, you want a room that has a bit of everything, but this is not always going to be possible at home. My tip is to use a large flat piece of hardboard placed at your feet if the room is too soft, carpeted and full of furniture. This will bounce some reflections back up towards the microphone and help you get some highs back. Conversely, if the room is too bright, then you could use a rug or perhaps a duvet to soak up some of the excess high-end frequencies.
Mic’ing Acoustic Guitars
When recording acoustic guitars, don’t just plonk a microphone in front of the guitar’s sound hole. Chances are it will sound terrible, bass heavy and you will lose all the dynamics of your playing. For a far more balanced sound that captures the high end, place the mic about 12 to 16 inches away from the guitar’s 12th fret.
Now, if you need more bass all you do is move the microphone closer towards the sound hole, whilst maintaining that 12 – 16″ distance. Or if you need more high end frequencies, move it away towards the direction of the acoustic’s headstock.
Another nice trick is to move your microphone about 4-5 feet away from you and around 4-5 feet off the ground. This type of positioning will require a room that sounds pretty good to start off with, as it is relying on the space around you. Where it works quite nicely, is that you get a lot of the room sound as well. Like anything with microphone placement, experimentation is the key.
In an ideal situation, get someone else to strum the guitar and move the microphone around the room/guitar, whilst monitoring it on a set of headphones. That way you can hear what your microphone is hearing.
Free DAW and Amp Sim software
If you’re new to home to recording, I would recommend something simple like Studio One 4 Prime as a DAW for recording on Mac or PC. It is completely free and has all the requirements you might need to get recording. In the video below, you can get a brief overview of what it will do.
Then if you need some good quality free amp simulation software for recording electric guitars, because you either don’t own a microphone or just want to try some out, I would recommend you try the Mercuriall Audio freebies. They have some great amp sims, guitar effects and more on offer.
You can also check out my series of articles here on how to record guitars on a budget, or this post on free amp simulations.
Video
You are currently viewing a placeholder content from YouTube. To access the actual content, click the button below. Please note that doing so will share data with third-party providers.

This might also interest you