Beginner’s Guide to Subwoofer Placement: How to set up your Sub
 4,5 / 5,0 |

Subwoofer placement can be tricky, but it’s not rocket science! No matter if you’re looking to equip your studio, home theater, or hi-fi setup: subwoofers extend the low frequency response of your monitoring or listening setup. But where is the best place to put the subwoofer and how do you find its ideal position? Read our guide to subwoofer placement to get the most out of your sub!
Before we get started, here’s the ugly truth: No matter how well you analyze and/or measure your room and speakers, finding the ideal position for your subwoofer will likely involve some trial and error and – above all – lots of critical listening. Nevertheless, we have a few tips and guidelines for the perfect subwoofer placement for you!
Understanding Semi-Truths: “You can’t locate Subwoofers.”
A common misconception is that our ears cannot locate the origin of low frequencies. As a result, one could come to the conclusion that the position of the subwoofer in the room doesn’t matter. But that is wrong!
Here’s a more “correct” way of explaining the phenomenon. Subwoofers emit bass omnidirectionally, i.e. approximately equally strong in all directions. Therefore, the soundwaves spread out in a spherical pattern. However, this is only true for the “free field”, i.e. an open space with no reflections. In practice, room boundaries like walls, ceiling, and the floor limit the propagation of the sound waves. Unless you build your home cinema in your garden…
The walls do not throw back low frequencies as direct reflections, but rather shape them into a kind of static pressure pattern in the room. These standing waves are also known as room modes. As a result, there can be spots in the room where you can hardly hear any bass, and places where there is far too much bass and it sounds unnaturally boomy. Depending on the geometry of the room, rather strange patterns can occur. Predictions and exact calculations are almost impossible.
Basic Subwoofer Placement: Corner or Front
Fortunately, though, there are certain positions that almost always work reasonably well. The first option would be to place the subwoofer in a corner of the room, since all room modes meet here anyway. However, this subwoofer placement will result in the bass being significantly louder. You can counteract this using the volume control of the sub.
It’s best to play some music and pay attention to how the bass sounds in your listening position; this can be the studio chair or even the couch. If certain specific frequencies are always too loud, you could absolutely correct this with an equalizer. But remember: in this case, you should only use an EQ to cut frequencies; boosting anything doesn’t help at all and can do considerable damage. Some subwoofers, such as certain models from Neumann and Genelec, have integrated room correction features and can take care of this task semi-automatically.


A somewhat more challenging experiment is to bring the subwoofer close to the speakers. Here we refer to the front speakers, i.e. stereo, even if you have a surround setup. At this point, I’d like to point out that there’s nothing stopping you from using two or more subwoofers in a room to excite said room modes in different places in a more balanced fashion. It can be helpful, especially when using two subs, to place one subwoofer next to the left speaker and the other next to the right speaker – or even below them. With “only” one subwoofer, I also recommend trying the center position between the two speakers. A few centimeters to the left or right can already make a significant difference.
Subwoofer Placement: Give your Back a Break!
A subwoofer can be seriously heavy, and as we’ve already established, finding the correct placement can involve lots of moving around. So here’s a pro tip that can spare you a visit to the chiropractor: put the sub on a dolly while you’re experimenting!
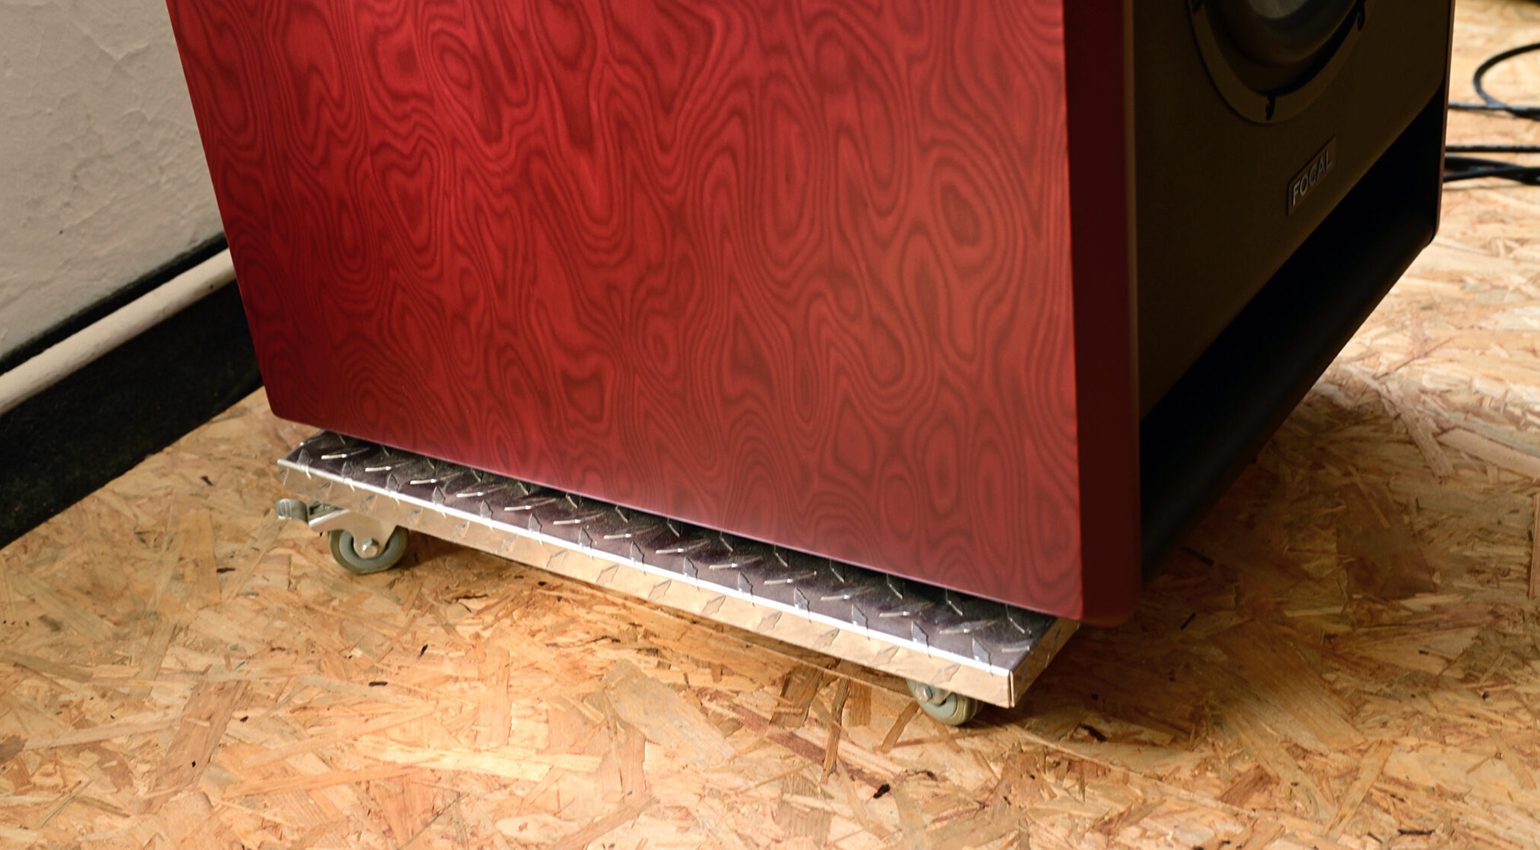
If your subwoofer is heavy, a dolly comes in handy for placement experiments. · Source: Bonedo
I also highly recommend getting help from another person, as they can then move the subwoofer back and forth between the speakers while you lean back in the executive chair aka sweet spot and listen to the results. This makes A/B comparisons a lot easier and helps evaluate how the changes affect the overall acoustical picture.
When searching for the perfect subwoofer placement, I find that the exclusion method often helps me more than the inclusion method. I first look for the spots where it definitely sounds bad before I begin to think about where it sounds particularly good. But what does “sound good” really mean?
Subwoofer Placement is all about listening
The first thing you should pay attention to is the level. Which position makes the bass the loudest? Where do different bass notes sound equally loud? Those considerations are a good starting point, although they’re far from the last word when it comes to correct subwoofer placement.
Now is a great time to take a closer look at the back of the sub. In addition to the volume knob, you will – hopefully – find a phase or polarity switch that reverses or inverts the phase of the subwoofer. In other words, it determines whether the membrane first moves forward or backward. The goal is to ensure that the woofer moves forward when the other speakers do. Otherwise, they would cancel each other out a bit, and that’s not what we want.
Can I please speak to the Manager?
Besides the volume knob and phase switch, active subwoofers usually have even more adjustment options. For example, there might be a phase knob that allows you to rotate the phase in finer increments, as opposed to simply flipping it from 0° to 180° or vice versa. In conjunction with the phase switch, this ultimately enables a full-circle bass rotation from 180° to 360°. We’ll talk more about phase issues later.
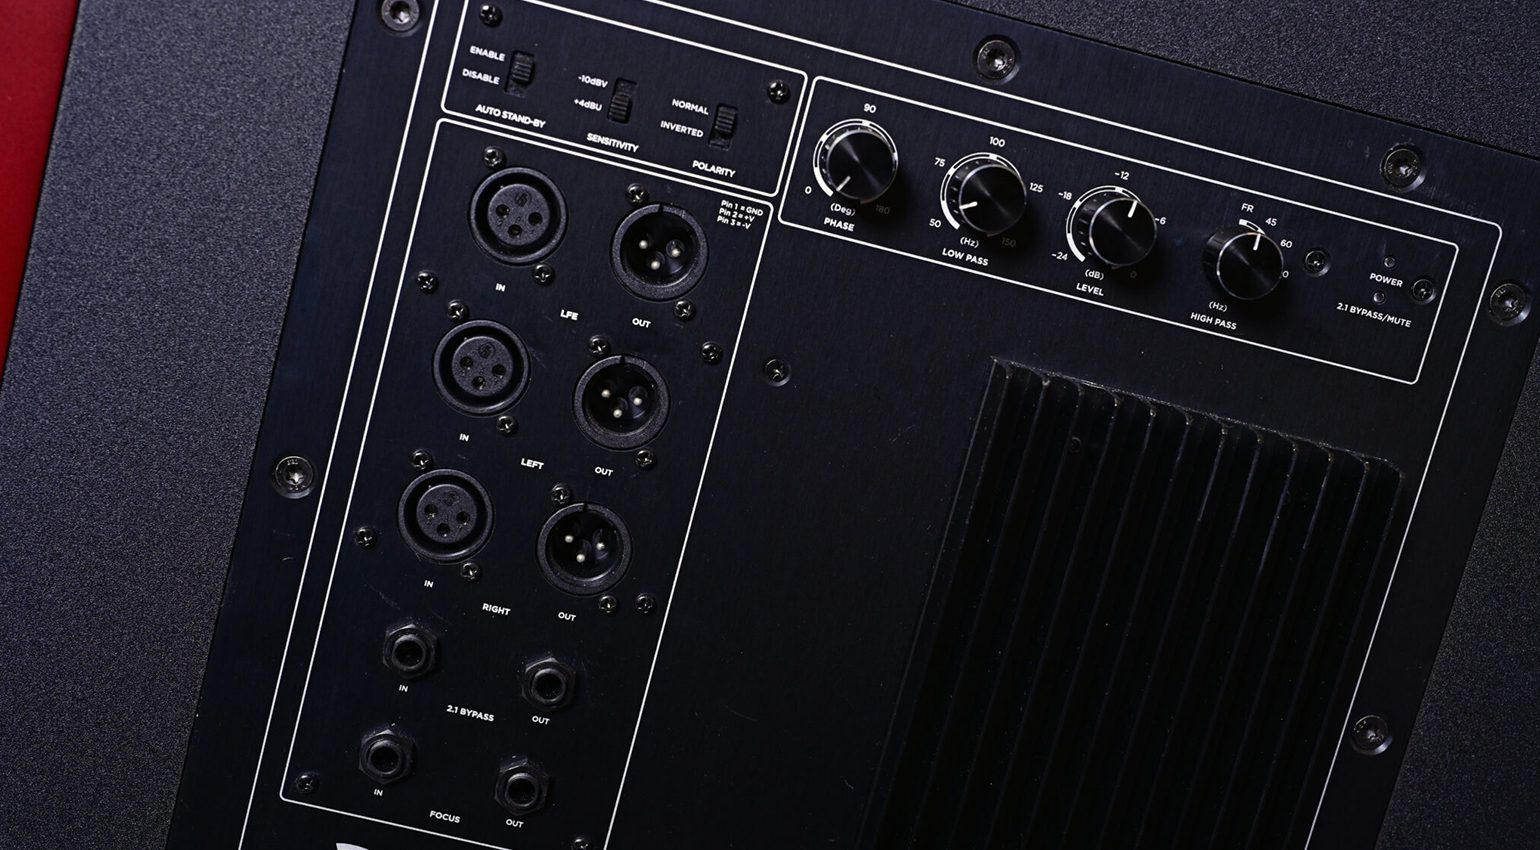
Correct subwoofer placement also involves wiring them correctly. With separate inputs for LFE and stereo, this particular sub allows for both external and internal bass management. · Source: Bonedo
Furthermore, the vast majority of active subwoofers offer a low-pass or high-cut filter that sets an upper frequency limit to the bass reproduction of the subwoofer. This setting (which also depends on the frequency response of your main speakers) helps to ensure that the subwoofer sounds less boomy and is even more difficult to locate acoustically. If you don’t have an active subwoofer – in other words, a subwoofer without built-in amplification – your amplifier/receiver may also be able to do this. But that depends on the model and ultimately on the price.
If an active subwoofer has additional inputs and outputs, for example for stereo or surround speakers, that is generally referred to as integrated bass management. In this case, you’ll often also find low-cut filters for the satellite speakers.
Low Frequency Effect or 2.1
In cinema surround setups, the subwoofer is primarily responsible for low-frequency special effects, hence its name: LFE or Low Frequency Effect. Therefore, professional subwoofers often offer an LFE input in addition to the stereo/2.1 or surround connections. LFE loop-through outputs are also sometimes provided. Since the decisions about which frequencies are to be reproduced by the LFE have already been made by the surround mixer, this input does not need any additional filters. If it has them anyway, that’s a plus.
Subwoofer Placement: Avoid Frequency Clutter
In addition to the LFE job, subwoofers also have the task of relieving the main speakers by providing a downward frequency extension. In some home cinema setups with tiny satellites, the subwoofer may even be the only speaker in the system that delivers any meaningful bass response at all. That’s why LFE is also sometimes spelled out as “Low Frequency Extension”. But that’s not technically correct and not the original meaning of this abbreviation.
One benefit of using a subwoofer is that your satellite speakers don’t have to work as hard. Using a high-pass filter, you can set a lower limit for their frequency response. Depending on the setup and speaker models, you’ll find this in the satellites themselves or in the subwoofer. On the one hand, this helps to avoid overloading the satellites, on the other hand, it counteracts unwanted frequency overlaps in the low bass range.
The latter can and will become a problem, since it is really difficult to align all the diaphragms of the various speakers and the subwoofer so that they move in sync and in the same direction – and to ensure that their impulses arrive simultaneously at the ideal listening position. This gets even more tricky when you’re aiming for a larger sweet spot, for example in a cinema setup.
If they don’t line up, you may still have more bass, but certainly not in phase. This can result in the bass coming too early or too late or sounding muddy and undefined. In my experience, the best way to check this is to listen to some brutally deep electronic kick drums and make sure that the punchy attack really comes at the same time as the “oomph”. I always recommend techno tracks by Jens Zimmermann as a reference.
Subwoofer Placement: Phase Alignment
Before it gets a bit more complicated, here’s a short summary. Speakers that are looped through the sub are called satellites. For these, there is usually a separate filter (a low-cut or high-pass) – not to be confused with the low-pass or high-cut that affects the subwoofer itself.
Ideally, the speakers and the sub should be set to the same crossover frequency to minimize the overlap between the speakers and the sub. For example, the speakers could reproduce frequencies down to 45 Hz and the sub takes care of everything below that. Some models have a common control for both filters, so their frequencies always match.
In practice, however, you can sometimes get away with a small “hole” or even dial in a deliberate overlap. The smoothness and slope of the filters also play an important role, as there’s no such thing as an infinitely steep filter.
And now it gets philosophical. In general, I tend to prefer the lowest possible crossover frequency. I like large main speakers for the punch they deliver – so why should I spend so much money on them only to restrict them to 120 Hz and above? Exactly, that would make no sense. Neither does it sound very good.
However, the lower the crossover frequency, the more you have to pay attention to correct phase alignment, i.e. the synchronization of the sub and speakers, especially in the transition range. Obviously, the simplest solution would be to buy larger main speakers and leave out the sub entirely. If that’s not an option, it’s usually a good idea to choose a sub from the same manufacturer as your main speakers, because hopefully, they’ve tuned them well from the factory.
Zeroing the Phase
Now it gets a bit tricky. Once you’ve found a position that works reasonably well, the next step is to adjust the phase. To do this, invert the phase of your main speakers running in full-range mode – leave the low cut filter switched off for now. Since most main speakers don’t have a phase switch, a custom-soldered XLR cable with reversed hot and cold pins comes in very handy for this.
With passive speakers, you can simply swap the polarity of the speaker cables to invert the phase. · Source: Bonedo
Now adjust the phase of the subwoofer until you achieve the strongest possible bass cancellation with ONE of the speakers. If possible, you should start with the speaker closest to the sub. In order to achieve maximum cancellation, the levels of the subwoofer and speaker should be roughly equal. In practice, however, the level in the sweet spot is actually only reduced by a few decibels. As this can be difficult to pinpoint, it helps to invest in a decibel meter, which also comes in handy for lots of other tasks besides subwoofer placement.


And back into phase!
If you now remove the “inverting cable” from the speaker, the sub and speaker should be exactly in phase. Write down the settings, because the next step is to repeat the whole process with the other speaker. When you’re done, you can evaluate where and with which settings the cancellation has worked best.
Of course, you can also play around with the position of the sub again while you’re doing this. Another thing to try is to turn the sub around for testing, so that the woofer cone is aimed at the wall instead of the room. Unfortunately, the results are almost never completely unambiguous – the best possible compromise is what you’re aiming for!

Experiment with turning the subwoofer around. · Source: Bonedo
Theoretically, you could also leave the phase of the speakers untouched and invert the sub itself, then invert it again once you’ve found the settings and position with maximum cancellation. However, if the sub has finer phase adjustment, this can become inaccurate.
Dude, way too complicated – can’t subwoofer placement be easier?
Yes – by using the age-old crawling trick, which goes like this: First put the subwoofer where you want to sit later, i.e. in the intended sweet spot. Next, crawl around the room with your ears 30 cm or a foot above the floor and listen to where the bass sounds most balanced. Don’t forget to check all the corners! And that’s where you position the subwoofer, in the hope that it sounds just as good when you now listen from the sweet spot. A good set of knee pads is highly recommended!
More about monitor speakers
Note: This article was originally published in German on bonedo.de.
Note: This post contains affiliate links and/or widgets. When you buy a product via our affiliate partner, we receive a small commission that helps support what we do. Don’t worry, you pay the same price. Thanks for your support!


This might also interest you

4 responses to “Beginner’s Guide to Subwoofer Placement: How to set up your Sub”
Place the sub at your listening position and move around in your studio until the sub sounds good.
Standing waves are not known as ‘room modes’. The positive and negative interference patterns form NODES of local maxima and minima. Nodes and standing waves are a different thing and there is no such thing as ‘modes’ in acoustic physics.
I have furniture along all of my walls. Can I place the subwoofer in a ceiling corner instead of a floor corner?
Never switch polarity on a speaker they relly do work backwards and you can damage the voice coil as well ! I know first hand.