My 10-Minute Guitar Masterclass for Beginners
Learn the "Three Zone" approach, a 10-minute lesson for new guitarists
 4,8 / 5,0 |

Are you tired of mindlessly noodling up and down the fretboard and ready to elevate your playing? This weekend, I wanted to share one of my 10-minute lessons for new guitarists, which will help you use the most commonly known scale, the Pentatonic Scale.
10-Minute Guitar Masterclass for Beginners
What is a Pentatonic Scale?
I’m guessing a lot of our readers will be getting either a new guitar or their first guitar in the next week or so as a present. I’ve been playing the guitar since I was a kid, and so I often get asked by friends who are just starting for some tips on where to start and what to practice.
There is no magic ‘secret’ process that will accelerate your playing. However, you will encounter this scale everywhere, so this is where I would recommend you start. Please read through this whole lesson (it should take roughly 10 minutes) and then put these sections into your routine.
It is aimed at beginners, but the techniques can be applied to any scale or pattern on the guitar.
In this lesson, we are focusing on the beginner-friendly pentatonic scale. Unlike major or minor scales, which contain seven notes, the pentatonic scale is streamlined to just five notes per octave. This makes it far more straightforward to learn and significantly easier to use when improvising.
It is the perfect starting point because it sounds great almost immediately, allowing you to focus on how you play rather than just what you play.
The A Minor Pentatonic Scale: Your New Best Friend
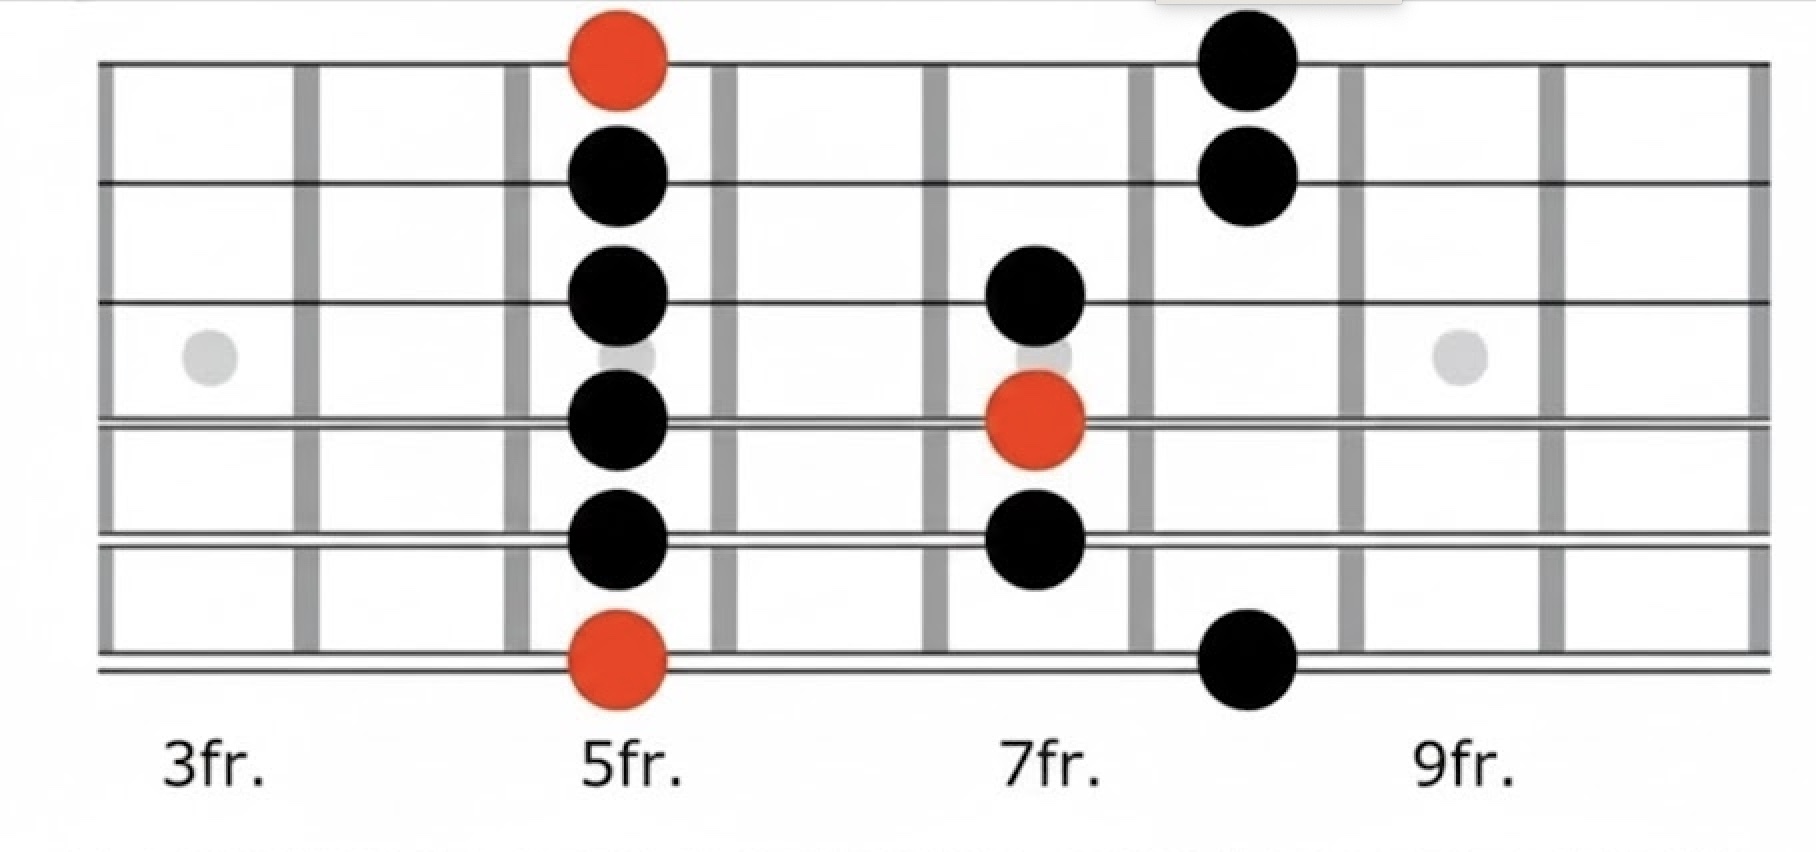
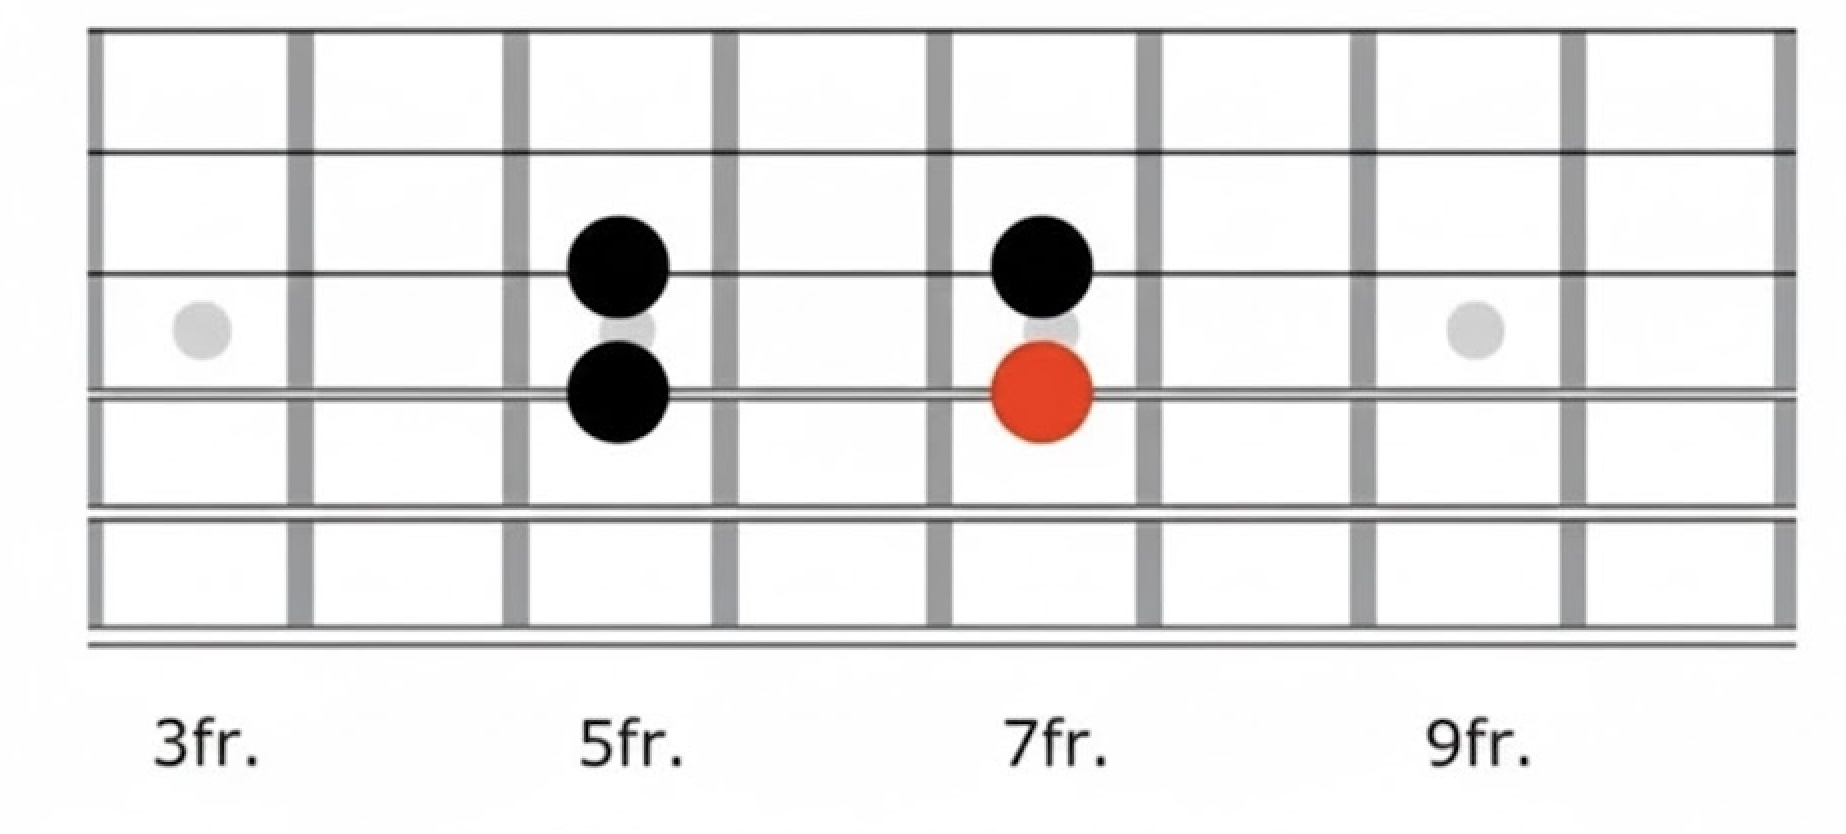
We will specifically look at the A Minor Pentatonic Scale. It is widely considered the “home base” for rock and blues guitarists. To get started, you need to find the root note on your fretboard.
Here is the full pattern for the scale, played from the thickest string to the thinnest:
- Low E String: Play the 5th fret, then the 8th fret.
- A String: Play the 5th fret, then the 7th fret.
- D String: Play the 5th fret, then the 7th fret.
- G String: Play the 5th fret, then the 7th fret.
- B String: Play the 5th fret, then the 8th fret.
- High E String: Play the 5th fret, then the 8th fret.
The diagram below shows you a visual representation of this A Minor Pentatonic Scale, and the root notes of “A’ are marked with red dots.
How to Practice Effectively
New guitarists often rush, but the golden rule here is that slow and steady wins the race. Focus entirely on playing each note cleanly rather than quickly. Thankfully, there are no big stretches here, and the scale can be played in one position without having to move your hand up and down the length of the guitar neck.
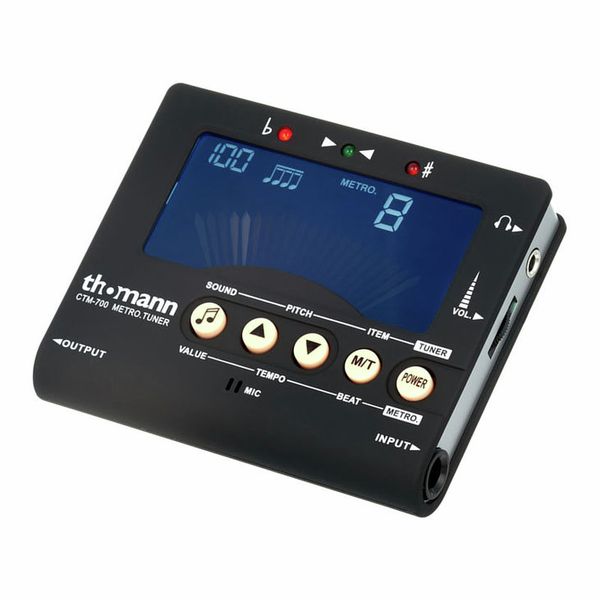
Metronome
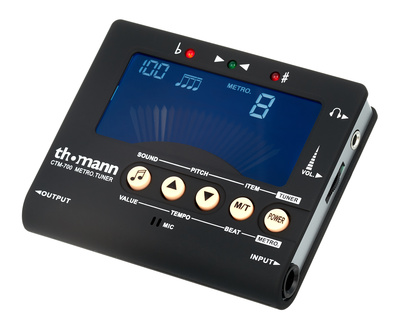
To develop a professional sense of rhythm, you should practice with a metronome or a drum machine. You can even download a simple one for most smartphones to get you going. This simple habit will tighten your timing and make your playing sound much more confident.
I’d recommend this affordable model from Thomann, as it has everything you need and a built-in chromatic tuner.


Top Tip
It is also helpful to record yourself. Again, most smartphones have built-in audio recording apps that will work fine for this.
Listening back to your own playing can reveal sloppy habits you might miss while you are concentrating on your fingers. If the full scale feels overwhelming, break it down into smaller sections and master just two strings at a time.
Keep your old recording, so you can listen back and hear how you have progressed over time. You will get better, and these recordings will plot your progress over time. If you are having a ‘bad guitar day,’ go and listen to yourself playing 6 months ago and see just how much better you are now as a player.
Don’t Just Walk—Make Music!
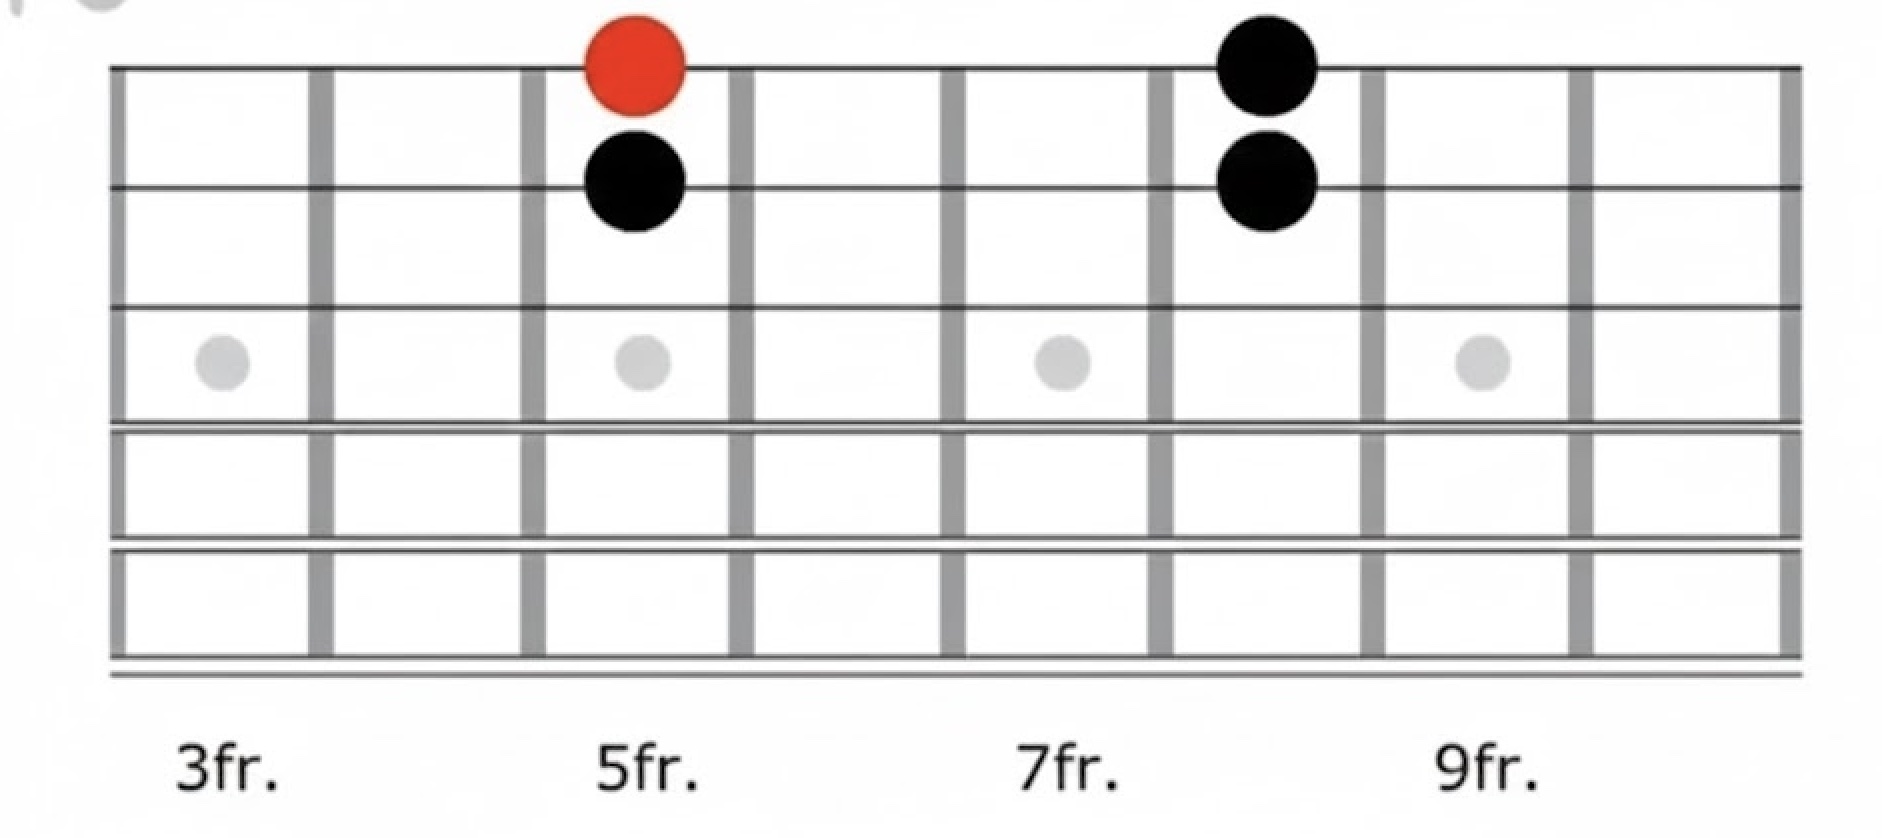
Many players make the mistake of simply “walking” up and down the scale shape. While this is a great physical exercise, it isn’t music—it is just reciting information. To turn a scale into a melody, you need to identify your target notes.
In the A Minor Pentatonic, your Root Notes (A) are the foundation of your sound. They act as “home.” In the shape we just learned, you can find the root notes (marked red in my diagram) at the 5th fret of the Low E, the 7th fret of the D string, and the 5th fret of the High E.
Knowing where these notes are allows you to resolve your licks. Instead of ending a phrase on a random note, try landing on a root note to give your solo a sense of completion.
Expressive Techniques
Once you know the notes, you must change how you touch them to create emotion. You can use hammer-ons and pull-offs to connect notes for a flowing, liquid sound.
You can add bends to reach between the pitches and mimic the human voice, or apply vibrato—pulsating the string slightly—to add warmth and sustain to a held note. These techniques are what transform a mechanical scale into a soulful solo.
The “Three Zone” Approach
To stop your playing from sounding like a boring exercise, we can mentally divide the large-scale shape into three distinct “zones” or boxes. This allows you to focus on specific tonal areas.
The Low Register (Zone 1) focuses on the bass frequencies. This involves the Low E string (5th and 8th frets) and the A string (5th and 7th frets).
Riffs played here sound heavy and rhythmic.

The Middle Register (Zone 2) is where many classic rock licks live. This covers the D and G strings (both playing the 5th and 7th frets).
This area is perfect for punchy, melodic phrases.
The High Register (Zone 3) is for screaming leads. This uses the B and High E strings (both playing the 5th and 8th frets).
This is where you go when you want your solo to cut through the mix and soar.
By isolating these zones, you can experiment with melodic ideas in a smaller area. Use the root note (in these examples, A) in each zone as an anchor to guide your improvisation.
Taking It to the Next Level
Once you have mastered the basic shape and the three zones, don’t stop there. Experiment with different rhythms, such as a blues shuffle or a funk groove, to see how the same notes change character.
Continue refining your bending and vibrato, and eventually learn the pentatonic scale in different positions up the neck. This will unlock the entire fretboard and ensure you never run out of ideas.
Phrasing
Think of your fingers as a singer’s vocal cords. Instead of just plucking a string, you can change the character of a note using different physical movements.
Earlier, I mentioned hammer-ons, pull-offs, bends, and vibrato. Here is where we can add all these elements and more to make our guitar sing.
Slides allow you to glide into a note from above or below, creating a sleek, connected sound. When you slide into a root note, it feels more intentional and stylish than simply hitting the fret. Similarly, Bending allows you to reach notes “in between” the frets. By pushing the string up, you create a crying or soaring effect that mimics a vocalist’s pitch control.
Vibrato is perhaps the most personal phrasing tool. By slightly oscillating the string up and down after you hit a note, you add sustain and “shimmer.” A slow, wide vibrato sounds dramatic and heavy, while a fast, tight vibrato can sound nervous or high-energy.
Space and Silence: The “Breath” Technique
One of the most prominent mistakes guitarists make is playing “note diarrhea”—a constant stream of sound with no breaks. To fix this, try the Exhale Technique.
Imagine you are a saxophone player; you can only play as long as you have breath in your lungs. Take a deep breath, and as you exhale, play your lick. When you run out of air, you must stop playing to take another breath. This forced silence creates “negative space,” allowing the listener to digest the melody you just played.
Silence is often more potent than the notes themselves.
I would highly recommend listening to Charlie Parker and John Coltrane, because as guitar players, we can learn a lot from their phrasing. Saxophone players are a really great source for ideas when you play the guitar, as their lung capacity will always be a factor for their licks.
Call and Response
This is a classic storytelling technique used in blues and rock. Think of your solo as a conversation between two people.
You play a short, simple “Question” lick (the Call). Then, you follow it up with an “Answer” (the Response).
The answer might use the same rhythm as the call but end on a different note, or it might be played an octave higher. This creates a logical flow that the listener’s brain can follow, making your solo feel like a cohesive story rather than a random collection of licks.
Rhythmic Variety and Dynamics
If every note is the same volume and length, your playing will sound like a computer. To add soul, experiment with Dynamics: start a phrase with a soft, whisper-like touch and gradually pick harder to “scream” as you reach the climax of your solo.
You should also play with Rhythmic Displacement. Instead of always starting your lick on the “1” beat, try starting half a second late. Playing “behind the beat” gives your phrasing a relaxed, soulful feel, while playing slightly ahead can add urgency and excitement.
Get that metronome out and use it to work with your timing.
What Next?
This journey of music never ends, and that is what makes learning a new instrument so fantastic.
I would always suggest using your ears to pick up on the music you hear around you. Another handy skill is to either hum or sing the notes as you play them on your guitar, as this will help your brain make the connection and really helps as you progress.
Whenever you have an opportunity to play with other musicians, take it, and ideally, play with musicians who are more accomplished than you, as it is a great way to learn new ideas and push yourself.
Build up those fingertip callouses, go slow to start, and enjoy the ride!


This might also interest you