Sample Selection: A Shortcut To Great Mixes
Choosing the right sounds can do more than just save time.
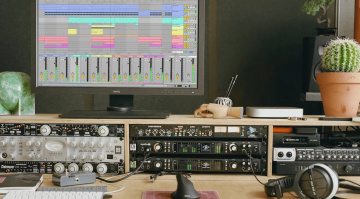
Sample Selection: A Shortcut To Great Mixes · Source: ModeAudio Analog Tape Drums / Splice

In modern music genres where most of the instruments are generated inside your DAW, sample selection becomes a not-so-secret weapon.
Key Facts about Sample Selection:
- In modern music production, sample selection affects the end result more than any type of processing. While poorly chosen samples cause you to take a corrective route in mixing, thoughtfully chosen sounds complement each other naturally without needing loads of compression and EQ.
- Getting sample selection right at the beginning of the music production process avoids clashes in the frequency spectrum. This means choosing samples that occupy different frequency ranges, which is particularly crucial in the low-end for the kick and bass relationship. As a result, the mix has effortless separation and definition.
- When samples with different transient aspects, such as attack, sustain, and decay, complement each other, they increase the definition and reinforce the overall impact. By combining a punchy kick with a sustained bass sound, each element has breathing room, while using sounds with similar transient characteristics can create clutter.
- By auditioning samples in the context we are using them, we remove the guesswork. While a sample may seem impressive in isolation, it might not fit cohesively when grouped with other sounds. When we focus on the interaction between samples, it streamlines the creative process and produces better mixes.
In this Article:
Ever been in the thick of a mix where certain elements just won’t sit right, no matter which way you stack those compressor and EQ plugins? Well, the truth is, these problems usually don’t just crop up while mixing. Instead, they arise during the initial pre-production phase in which we choose our samples.
The only way to avoid this is by spending time creating a carefully selected sample set with sounds that complement each other tonally and create a well-separated mix. This process is almost like building a template, where we select sounds that suit the particular style of music we’re working with.
Why Sample Selection Matters
Each sound we think of using in a song has its own unique profile made up of tonal, dynamic, and transient characteristics. When we choose samples that work together, these elements help the mix fall into place naturally. However, if we’ve chosen sounds that clash, they might be competing for the same frequency range, have mismatching transient profiles, or have opposing timbral and tonal characters.
As a result, we can spend ages trying to correct issues that wouldn’t be there if the samples were in a friendlier context. If we think of samples as ingredients in the cooking process, it makes sense that carefully chosen high-quality elements will require less enhancement and correction.
Sample Selection: Kick and Bass
No matter which genre you’re working with, getting a clearly defined low-end remains a foundational challenge within music production. If you listen to great mixes, most of them contain a kick and bass that complement each other naturally.
Rather than using EQ to create space, search for:
- A kick drum with a well-defined fundamental frequency (either between 50 – 60 or 80 – 100 Hz, depending on the music style)
- A bass sound contained in a range either above or below the kick
- Sound envelopes that complement each other (a punchy short kick matches with a sustained 808 bass sound in trap music)
When browsing through sounds, always audition your samples in context rather than in isolation. That earth-shattering kick might be completely masked by the bass sound you intend to use.
Tip: The easiest way to learn about kick and bass relationships is by listening to real-world examples. Notice how a Drum & Bass kick always sits clearly above the bassline, whereas in techno, the kick and bass often occupy the same range with the help of clever sidechaining.
Sample Selection: Matching Tonal Characteristics
As we touched on briefly earlier, each sample we scroll through has its own tonal profile. This could be dark or bright, harsh or warm, or even with a midrange that sounds like it’s pushed slightly forward. With too many bright samples, the mix can quickly turn brittle, whereas an overpopulation of darker sounds can make the mix feel dull.
Focus on creating a clear balance:
- Match warm snare samples with brighter hi-hats
- Use midrange-rich sounds with those that are scooped in this area
- Don’t stack samples in the same area of the frequency range
Tip: If you find yourself creating opposing severe EQ curves on two sounds simply to keep them in the track, they probably didn’t complement each other in the first place. Also, keep in mind that if you plan on adding prominent vocal elements to the track, you’ll need to select sounds that don’t infringe upon the vocal range.
Sample Selection: Transients
Transient profiles are crucial because they can create definition and power. As with the tonal aspects, building a balance is the key. A mix overloaded with aggressive transient info feels like chaotic audio mustard, while without transients, the mix lacks the impact to catch the listener’s ear.
When choosing samples:
- Select sharper transients to define the core rhythm pattern (kick, snare, pluck)
- Use more gradual envelopes for the accompanying sounds (pads and textures)
- Unless you’re creating a specific textured effect, avoid layering clicky samples
Tip: Strategically stacking samples is a powerful technique, but only when each layer is doing a specific job. When we use one layer for the attack in one frequency range, another layer for the main body of the sound, and another for the sustain, it becomes a creative sound design process driven by intention.
Sample Selection: Choose “Finished” Sounds
A mistake often made when choosing samples is to select sounds with the idea of correcting them in production. Using samples that are too rough, too raw, or too neutral can lead to an unnecessary cycle of constant sound processing.
As an alternative, ask questions like:
- Is this sample already close enough to the sound I want?
- Is it good enough to be in the final product?
Tip: Most of the sample libraries you’ll find are pre-processed and mix-ready. As a beginner, you can develop your skills and taste by using ready-made samples, and over time, you’ll be able to instantly recognize samples that will fit into your tracks. Pre-processed doesn’t mean that you’re cutting corners. In most cases, the processing actually gives the sounds more clarity.
Sample Selection: Context Is Key
Judging samples in isolation doesn’t always give you an accurate reading. Some sounds that seem weak or lacklustre when soloed could actually fit the mix perfectly, while your favourite soloed sample could be catastrophic in the context of other sounds.
Always work in context:
- Have a looped section of the track running
- Audition and swap out samples while the loop is playing
- Focus on the bigger picture of how the sounds work together more than their individual qualities
Tip: This approach can streamline your decision-making process and help you get to grips with your track as a whole.
Sample Selection: Avoid Frequency Crowding
When there are multiple elements in the same range of the frequency spectrum, the track can become muddy. As the sounds overlap and mask one another, it ruins the definition of the groove, which is essential in both pop and electronic music.
While choosing the samples:
- Put a cap on the number of sounds with heavy lower midrange
- Be aware of harmonic elements overlapping (vocals, synths, and guitars)
- Select sounds with frequency profiles that complement rather than mirror the other sounds
Tip: Not every sound in your mix needs to be maximized and larger than life. Impactful mixes contain multiple subtle complementary elements that hold everything together.
Sample Selection: Build Your Own Personal Sample Library
It’s important to see the process of choosing sounds as separate from music production. Although it may seem tedious at first, creating your own specially curated sound library will boost the creative process the moment the idea strikes.
Manage samples according to:
- Instrument type (kick, snare, bass, transitional effects)
- Tonal character (bright, dark, punchy, scooped)
- Music genre or project type
As you repeat the process, you’ll find out which samples work together consistently, and this helps you make creative decisions more confidently.
Sample Selection: Commit To Sounds Early
Making the shift from having endless options to committing to your sample choices early is a key part of the process. Non-finite ideas can easily be second-guessed, leading to constant tweaking and overproducing.
If you find a sound that works, stash it. If a sample doesn’t work, simply replace it, but don’t try to force the process.
A carefully chosen sample needs:
- Little or no EQ
- Subtle compression or none at all
- A shorter plugin chain
Less processing means a smoother workflow, but without compromising clarity.
Conclusion
Great mixes aren’t constructed, they are revealed through a subtractive method, the way a sculptor carves a form from a stone slab. With well-selected samples, this process becomes about refining rather than correcting.
Next time you find yourself in a struggle while mixing, another plugin might not be the answer. Return to the core elements and swap out the offending sound before you start rebuilding the mix with intent.
More often than not, the quickest route to the perfect mix is through careful choosing of the raw materials.
FAQs
1. What is sample selection in music production?
Sample selection involves choosing the sounds that become the core of the track, such as drum hits, loops, instruments, and one-shots. When executed correctly, this process allows the sounds to complement each other through their frequency, dynamics, and tonal characteristics.
2. Why is sample selection important for mixing?
A carefully chosen group of sounds requires less processing. As the samples work together, we can dedicate less time to corrective processing on individual elements and spend more time on the mix as a whole. Well-chosen samples create clarity and cohesion in the mix.
3. How do I choose samples that fit well together?
Selecting samples starts by hearing them within the context of the track. Listen carefully to the tonal, transient, and frequency range characteristics and how they interact. Contrast rather than uniformity determines our approach, giving each sample its own place in the mix.
4. Can sample selection replace mixing?
No. Even when it’s done effectively, sample selection isn’t a substitute for mixing. However, it can simplify the process and allow you to focus on subtle enhancement and overall balance rather than error correcting. This speeds up the workflow and makes it easier to achieve clarity.
5. What are some common sample selection mistakes?
Mistakes often made include auditioning sounds in isolation, layering samples in a similar frequency range, stacking sounds without a clear intent, and relying on post-production to compensate for weak sample choices. As a result, these issues cause muddy, cluttered, and unmanageable mixes.
More Info:
*Note: This article contains affiliate links and product widgets that help us fund our site. Don’t worry: the price for you always stays the same! If you buy something through these links, we will receive a small commission. Thank you for your support!

This might also interest you