Session Setup Essentials: How To Prepare For A Recording Session
Preparing your studio for the upcoming recording, mixing, or songwriting session.
 3,7 / 5,0 |
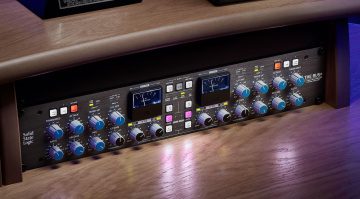
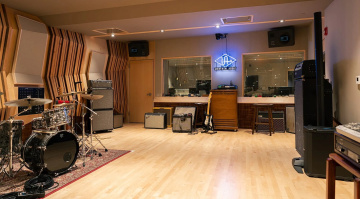
Session Setup Essentials: How To Prepare For A Recording Session · Source: Universal Audio

We discuss Session Setup Essentials with some helpful steps you can take in preparation for recordings that apply in any kind of studio environment.
In this Article:
Capturing outstanding recordings isn’t only about sound quality; it’s about preparing the studio environment to allow for a smooth collaborative workflow. Because pro studio facilities are generally set up to handle large collaborative teams, there are principles we can adapt and scale to fit home studios to make them more accommodating.
This way, we can still structure the recording session in a professional way to ensure that there are no unintended workflow inhibitors and the creativity flows from one stage of the recording process to the next. Naturally, the steps you take affect end result, so when these fundamentals are covered, we can focus on the music-making part.
Session Setup Essentials: Starting with a Clear Vision
Before we open the DAW, we need to set the parameters that define the session’s purpose. This depends on whether we are tracking a band, arranging a dance remix, or mixing down a previous recording session. In each of these scenarios, we need a slightly different approach, and keeping the end product in mind helps us determine the signal processing, routing, and track layout.
When you’re tracking vocals or instruments in your DAW, for example, the usual priority is to have the lowest possible latency for accurate monitoring and a clean signal chain that allows flexible post-production decisions. Meanwhile, a mixing session, on the other hand, may rely on bus processing and the use of CPU-heavy plugins. By starting out with a clear intent, we don’t waste time making adjustments later.
Session Setup Essentials: Workflow Templates
Using templates is one of the most effective ways of preparing for recording sessions. Instead of having to build our workflow from scratch in every session, we can use templates designed specifically for tasks such as beat production, vocal tracking, or mixing.
An effective template usually has:
- Labelled and colour-coded channels
- A basic routing system with channel groups and aux sends set up
- Initial gain staging on faders and sends
- Applicable plugins such as EQs, compressors, metering, and effects (reverb and delay)
Using a template not only saves time but also ensures a consistent approach for every session. As you repeat the process for the various applications, this consistency speeds up decision-making and helps refine your overall sound.
Session Setup Essentials: Logical Track Layout
When the DAW session is cluttered, it can destroy the momentum. So, we can avoid this by organizing the tracks in an intuitive way that suits the application and music style.
Usually, this involves grouping the channels according to the types of instruments:
- Drums (kick, snare, overheads, etc.)
- Bass
- Instruments (guitars, keyboards, synths)
- Vocals (lead, doubles, harmonies)
With distinctive colour-coding, we can speed up navigation. This ensures that as the session track count expands, our instrument groups remain easily distinguishable.
Naming tracks is just as important, because trying to remember what “Audio 01” means every time you need a certain instrument will slow you down. Rather, use a succinct but descriptive name like “Snare Top Mic” or “Lead Vox Double”.


Session Setup Essentials: Initial Gain Staging
Gain staging is a part of session prep that is often overlooked. By setting your levels from the get-go, you can ensure there is no clipping on your individual channels and a healthy amount of headroom on your master bus.
Generally, we can start by keeping our channels peaking at between -12 and -6 dBFS.
As a result, we ensure:
- Optimized plugin processing chains
- Improved summing in your mix bus
- Less risk of distortion
When it’s time to record, ensure your input gain is healthy but not overdriven. Digital clipping can be particularly inflexible, preventing us from fixing it in post.
Session Setup Essentials: Signal Routing
The efficiency of signal routing is often what separates professional recording sessions from amateur ones. Instead of having to deal with each track individually, channel groups can speed up the workflow considerably.
For instance:
- Assigning all drums to a single drum bus
- Grouping backing vocals with a bus
- Using a bus for all guitar channels
With this approach, you can process a large number of channels with a single chain of plugins (EQ, compression, and saturation). In addition, automation is far more straightforward with 6 or 7 main channel groups, while all the individual channel faders remain as you set them.
Using aux sends is also important, especially for:
- Reverb
- Delay
- Parallel compression
By using sends, you can share effects across your projects, which reduces the CPU load and unifies the various sections of your mix.


Session Setup Essentials: Latency
When tracking, the amount of latency present in the monitor signal can affect the performer’s confidence. When we increase the buffer size in our DAW, we also increase the latency. So using a low buffer size (128 samples or lower) ensures accuracy and responsiveness. What’s more, some DAWs have a low-latency or “live” mode to optimize latency for tracking.
Mixing, on the other hand, requires more processing power for all the plugins being used, so we can increase the buffer to put less strain on the CPU.
This balance between performance and CPU power is crucial, so we can set up the DAW session for a specific purpose, like tracking or mixing, by adjusting the buffer size accordingly.
Session Setup Essentials: File Management
The structure of a session isn’t only dependent on the signal management, it’s also about the management of the files associated with each project. Ensure your projects are labeled clearly in folders with:
- Samples and Audio files
- Project files
- Bounced/exported files
- Reference tracks
By sticking to a consistent naming system, we avoid mishaps and confusion, which is essential for collaboration or going back to older DAW projects.
Consolidation and cleanups are also good practices, as this ensures your project is efficient with no inactive channels or unused audio clips, and there are no missing files in the future. A “clean” DAW project loads up faster, so it’s worth the time.


Session Setup Essentials: Monitoring and Reference Tracks
Before commencing with a tracking or mixing session, drag a few appropriate reference tracks into your DAW. With these professionally produced audio files, we have a clear goal to work toward.
These references need to be routed directly to the main output without any processing, as this allows us to quickly do A/B comparisons to check critical aspects such as loudness, tonal balance, and stereo width. As we work through the different phases of our session, having these clear references provides context for our decision-making process.
The monitoring setup is just as important. We want to keep the monitoring level comfortable and consistent, as sudden volume changes can affect the flow of the session, resulting in ear fatigue and bad mixing decisions.
Session Setup Essentials: Backup and Version Control
Nothing kills a session faster than losing work, so it’s worthwhile making a habit of saving different project versions incrementally as you go.
Add info to the end of your project names as follows:
- “Mix_v1”
- “Mix_v2”
- “Mix_v3_final”
This way, you have an essential safety net in place that permits carefree experimentation at any stage, which creates an air of creative confidence. Meanwhile, you can use the automatic backup function in your DAW or cloud storage for additional security.

Session Setup Essentials: Conclusion
While session prep isn’t the most exciting aspect of the music creation process, it’s nevertheless one of the most essential. Technical tinkering can become a distraction quickly, so preparation creates a more focused environment and streamlines the workflow.
We can compare it to preparing a recording studio for a performance. All the functions are transparent, from talkback and monitoring levels to input gain structure, allowing the performer to focus on the music alone. This level of focus can be the difference between a decent recording and a great one.
More info:
*Note: This article contains affiliate links and product widgets that help us fund our site. Don’t worry: the price for you always stays the same! If you buy something through these links, we will receive a small commission. Thank you for your support!

This might also interest you