Gain Staging for PA Systems: Building a Clean Chain from Preamp to Loudspeaker
Get the most from the PA System in any venue.
 5,0 / 5,0 |
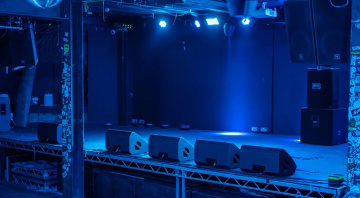
Gain Staging for PA Systems: Building a Clean Chain from Preamp to Loudspeaker · Source: Electro-Voice

We take a look at gain staging for PA systems, a crucial aspect of front-of-house mixing that can make the difference in any size venue.
In this Article:
When dealing with live PA systems, gain staging is an important and often misunderstood topic that can show us exactly where to set signal levels in the different parts of the chain for optimum audio performance. Whether you’re mixing FOH in a small bar or club, a large theatre, church, or outdoor festival, having good gain structure will help you maximize headroom and improve the overall clarity of the sound system.
We’ve all been to gigs where they’ve got it wrong, with distortion, noise, and feedback taking over the show rather than the performances you paid to see. Luckily, there are ways to avoid committing audio crimes, so let’s explore the different aspects of gain staging for live sound, and be sure to check out this article about reducing noise floor if you missed it.
Gain Staging for PA Systems: Understanding the Signal Chain
Before setting the gain correctly, it’s important to have some knowledge of the signal path within an audio system. A typical PA system setup may look a little like this:
Microphone → Mixing Console → Outboard Gear → PA Processor / Crossover System → Power Amplifier → Loudspeakers
At each individual stage in the chain, there are separate input and output levels. When we have audio signal running through the system, the various stages interact, and this will affect the signal in different ways. Depending on how each gain stage is set, this interaction could result in the signal remaining clear and dynamic or becoming distorted.
Because audio signals are dynamic, gain staging helps us to balance I/O levels, leaving enough headroom to avoid clipping while maintaining a consistent, strong volume. If there’s a golden rule to gain staging, it’s to keep the signal strong, but not to overcook it by boosting inappropriately.
When your levels are set too low, it can lead to boosting the stages at the end of the chain (downstream stages), like the amplifiers, which raises the noise floor considerably. Alternatively, if your input gain levels are set too high, you can clip your mic preamps and AD converters. The key is to find that healthy medium between the operating level and the point of clipping, with a bit of headroom to compensate for the dynamics of the performance.
Gain Staging for PA Systems: Setting the Console’s Input Gain
The first link in the gain chain is your mixing console’s input stage, which you’ll find on each channel, controlled by a knob labelled Gain or Trim. These input gain controls are crucial because you are setting the reference level for the entire audio system.
Let’s go through it step-by-step:
- Start by setting your faders on your active channels to unity gain (0 dB). This ensures that your chosen gain setting is also appropriate for mixing, rather than in isolation.
- Get performance-level input. For bands, this means playing the chorus of the loudest song on the setlist. Meanwhile, for DJs, you need the level of both decks playing as the DJ mixes one track into another.
- Adjust the input gain so that the meter peaks anywhere between -6 and 0 dB on digital metering or brushing the yellow on analogue VU metering.
- Avoid lighting up those red LEDs, as this means clipping. Once distortion is introduced into the signal path, you can’t get rid of it further down the line.
When you’ve finished gain staging all the active input channels, you’ll know that your faders are sitting within an optimum range, and you have enough headroom to push things without clipping your main mix bus.
Tip: Always reassess your channel input gains first if you notice any distortion on your mixbus, even at moderate fader levels. A common mistake is to pull faders down rather than trimming the input gains.


Gain Staging for PA Systems: Signal Management and Processing
Once your input gain is set correctly, you can optimize the signal on each channel with EQ, compression, and bus processing. Remember that whenever you engage a processing stage, you need to ensure consistent gain throughout.
EQ
When making EQ adjustments, keep in mind that boosting frequency bands increases the overall channel gain. If you need to boost or cut frequencies by 6 dB or more, you’ll need to go back to your preamp gain to compensate for these changes. You can also save time by thinking ahead during soundcheck and leaving appropriate headroom on the instruments that will need EQ boosts.
Dynamics
Engaging compressors, limiters, or gates affects the level of the signal. While compression reduces peaks, the makeup gain can balance or even surpass the input level. By monitoring the processed channel output and bypassing the compressor, we can compare and match the signals so that the perceived loudness is similar. Compressors are designed to reduce the dynamic range of a signal, not make it louder, although it can appear that way.
Subgroups and Busses
When you sum multiple channels on a bus or channel group, you increase the signal energy. This means that if we have five or more drum channels peaking at around -6db this will likely overload a subgroup. By keeping subgroup levels below clipping and living between 3 and 6dB of headroom on the main mix, we ensure signal clarity without pushing digital limiters or system processors.
Monitor Mixes
Regardless of the complexity of your monitor mixing system, you can still apply the same rules if you think of a monitor mix as a separate bus. The signal isn’t going to the main mix, but the monitoring signal chain starts with your aux sends, so ensure you use pre-fader sends (which ignore the position of the channel fader) and leave enough headroom for boosting signals, as the musicians may request more vocals, drums, or guitars in their monitor mix.

Gain Staging for PA Systems: System Processing and Amplifier Gain
As your mix leaves the mixing console, it travels through the PA system processor, amplifiers, and finally out of the loudspeakers. Here, we can look at ways to optimize the audio performance at each stage:
System Processor
The DSP or crossover system should be fed a clear, strong signal from the mixing console. We can do this by setting the input level at around 0 dBFS, while leaving a few dBs of headroom. Within the DSP system, ensure that any adjustments you make to the EQ, limiter, or crossover points are done carefully so you aren’t increasing or decreasing the gain.
Amp Sensitivity
Power amps have specific input sensitivity ratings, usually between 0.775 V and 1.4 V, which determine the input voltage required for the amp to reach full power. While active PA speakers don’t usually specify the input sensitivity, you can find unity gain at 12 o’clock on the gain knob. Setting the input controls too high increases the noise floor and also the risk of feedback. However, if the gain is set too conservatively, the speakers won’t put out their full potential, even with the mixing console maxing out.
Setup Procedure
- Send a pink noise signal or a test tone from the mixing console.
Adjust the system processor’s output so the amplifier’s metering indicates a healthy operating level, peaking just below the clipping point.
- Leave between 3 and 6 dB of headroom before the amp’s clip indicator lights up.
Once you have balanced settings, make a note of them, use labeling, and avoid making adjustments during shows.
Speaker Efficiency
Different classes of speakers have different sensitivity ratings. For example, 95 dB or 102 dB SPL per watt. By understanding this and matching the amps and speakers correctly, the amplification power will be balanced with no dips or peaks in the frequency range.

Gain Staging for PA Systems: Troubleshooting and Gain Management
Even though you may have planned out the gain structure of your system meticulously, the unpredictable nature of the live sound environment can throw you a few curveballs. You might be working with a performer or band for the first time, a piece of borrowed gear, or an unpredictable sound source, so it’s essential to learn how to recognize and correct any issues in the moment.
Commonly found problems and solutions:
- Distortion when faders or set low: Preamp gain (input trim) or the makeup gain on the compressor is too high.
- Console output is healthy, but the PA system sounds tame or weak: System processor is reducing gain, or amp sensitivity is set too low.
- Background noise (hiss or hum): Preamp gain is set too low, so the later gain stages are compensating and adding noise.
- System is sensitive to feedback: FOH or Monitor signals are overdriven and need more headroom
Field test: Start by testing the system with a single vocal mic plugged into the mixing console. Follow the signal chain methodically, checking levels from the mic preamp, to the console’s faders and output metering, through the system processor, and then the amplifiers. For optimized gain structure throughout, each stage should be operating at around its nominal level with some intermittent peaks. If you notice any noise or distortion, you can quickly track down the gain stage at fault.
Gain structure guide:
Microphone (healthy sound source) → Preamp Input on Console (-6 dB) → EQ/Comp (0 dB) → Mix Bus (-3 dB) → System Processor Input (0 dBFS max) → Processor Output (-3 dB) → Amplifier (headroom before clip) → Speakers
Practical exercise:
- Always begin with the console’s input gain controls turned down and the faders at unity.
- Add the sources one by one, adjusting the gain so that it peaks at -6 dB on each channel meter.
- Be sure to keep a watchful eye on your main mix bus metering, so you aren’t overloading it.
- To validate your system processor and amplifier settings, run pink noise through the system.
- Make minor adjustments until the PA system has clarity and focus with a healthy amount of headroom.
If you find noise or clipping at any gain stages, make a note of this. Treat these areas as weak links in your gain chain, and prioritize them when troubleshooting any issues. As you repeat the process, it becomes a familiar formula that you can easily adapt for different audio configurations and venues.
More about the Gain Staging for PA Systems:
*Note: This article contains affiliate links that help us finance our site. Don’t worry: the price for you always stays the same! If you purchase something through these links, we receive a small commission. Thank you for your support!

This might also interest you