
Make your Cheap Squier sound like an American Fender: Upgrade your Potentiometers!
Why upgrade your potentiometers?
 4,9 / 5,0 |

Last time in Part 1, we looked at the basics of soldering. Ideally you’ve had a chance to practise your soldering skills and it’s time to move onto upgrading and modifying your guitar. This week, I’m going to cover potentiometers and why you should upgrade yours before anything else.
Listen
To give you an idea of where to start, I would first suggest that you sit down and play your guitar through a clean amp setting. Use your ears and listen for where you want to start upgrading. Whilst playing, use your guitar’s controls and listen to how they affect your guitar’s tone.
So if you find for example a noisy scratchy volume or tone control then you can look at fixing that. Or perhaps your control doesn’t have a lot of range, sounds dull in certain positions or is just not working properly. Also, listen out for noise, buzzing or crackling in any settings.
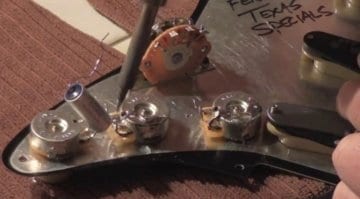
Potentiometers are where a lot of cheaper guitars often fall down. Many budget models have cheap potentiometers, so upgrading yours is a cheap upgrade that can give your guitar a much better tone.
As a guitarist, I use my volume and tone controls all the time, the best tones are often hidden in those controls. Clapton‘s Woman Tone comes from using those controls. Jeff Beck is widely regarded as a master of guitar controls, too.
Clean
Sometimes you can fix a problem just by cleaning your components. Getting crackle and noise from your volume or tone control? I would recommend using some Servisol Super 10 switch cleaner or WD40 contact cleaner. Just never spray regular WD40, the one in the blue can, on your electronic components. It isn’t a cleaner! A good contact cleaner can be used on potentiometers, switches and output jacks, so keep a can handy. That will last you ages, as you need very little to clean a guitar’s electronics.
Upgrades
But now we’re assuming you want to replace some of your controls. Great! First, make sure you have taken a photograph that clearly shows how your guitar is wired up before you start to change out components. If something goes not to plan, then you will be able to see how it all was wired up originally, which will save you losing your way.
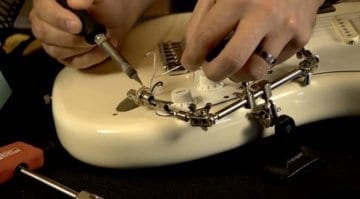
Make sure you have the right tools and also a calm, well-ventilated place to work. Soldering is something that produces nasty fumes and you won’t want any distractions whilst wielding a hot soldering iron.
Why upgrade your potentiometers?
I see lots and lots of players go out and spend a lot of money on new pickups for their cheap guitar, in the hope that it will make their guitar sound nicer. Often a set of pickups will cost you well over a 100 pounds. This could be half the price of your budget guitar’s value in many cases.
My suggestion is to change your potentiometers. Why? Because they have a huge effect on the tone of your pickups. They literally control what comes out of an electric guitar.
My two favourite potentiometer brands are probably CTS and Alpha because they are widely available, robust and are cheap upgrades for any guitar. If you do some more research on pots/potentiometers you will find that you can get ones with higher tolerances. Like anything with guitars, there are some that cost more than others. But if you have a budget Squier, my first tip would be to upgrade your pots!
Potentiometers
Volume pots should usually be logarithmic (sometimes called A, or audio taper) pots. When these are set at 5 then the volume is half what it is a 10. This doesn’t give exactly half the output voltage at 5, but it works the same as the way your ears work in response to the change in volume. The range is smooth and our ears/brain feel will feel that this is natural, pleasant sounding progression.
Logarithmic pots provide a very narrow control range. Electrically speaking, by running through 0 – 5 on the dial, you cover a very small range on the output, then tracking from 6 – 10 covers a much larger range.
Linear pots (or B pots) give half the voltage output when set at 5 compared to 10. Usually, they are used for tone pots. Linear pots give a true representation of the output, so 1 on the dial is 10% of the output, 5 is 50% and 10 is 100%.
With this knowledge, you can see we would typically use a Logarithmic or Audio Taper potentiometer for our volume control and a Linear one for our tone control.
250K or 500K?
The K number referred to here is the resistance, in Ohms. 250K means 250,000. As a very quick rule of thumb, use 250k for single coils and 500k for anything that’s either noise cancelling or humbucking. The logic behind this is that as any pickup gets hotter (caused by a rise in impedance and inductance) it also becomes darker. Humbuckers are, in essence, two single coils wired in series. They are normally hotter, so to keep them balanced they will often need brightening up just a little bit to make them appealing to the ear.

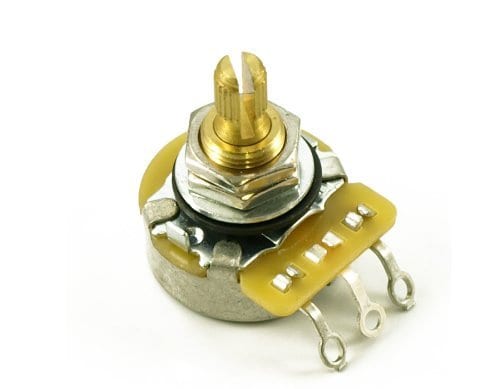
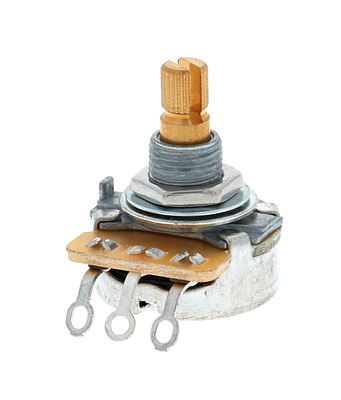
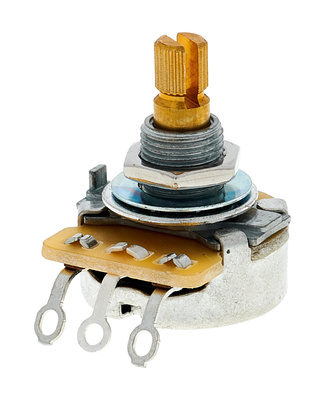
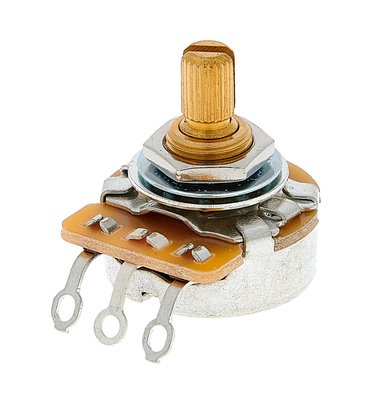
CTS 250k solid shaft potentiometer
Split Shaft?
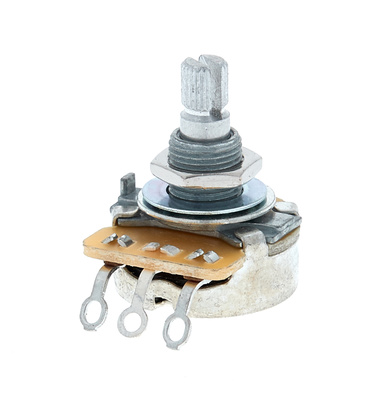
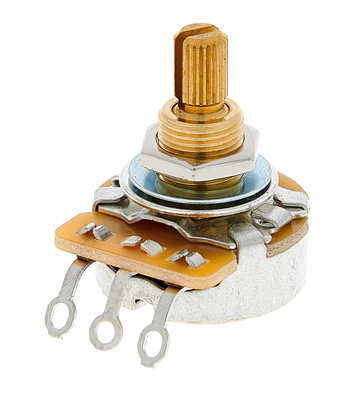
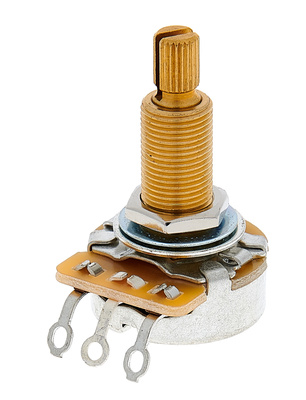
Most Fender-type guitars use split-shaft pots, meaning the shaft of the control has a slit down the middle. That will let you squeeze the Fender Stratocaster style knob onto them. But some guitar controls have a little grub screw on the side and these need a solid shaft post, as that grub screw needs to grip tight. Don’t use a split shaft pot with anything that uses a grub screw or it will break the shaft when you tighten it!
CTS 250k Split Shaft Pot
Wiring
My favourite place to look up wiring diagrams is Seymour Duncan‘s website. It has just about every permutation covered and the diagrams are clear and concise. Below I have added the standard Fender Stratocaster diagram, as an example.
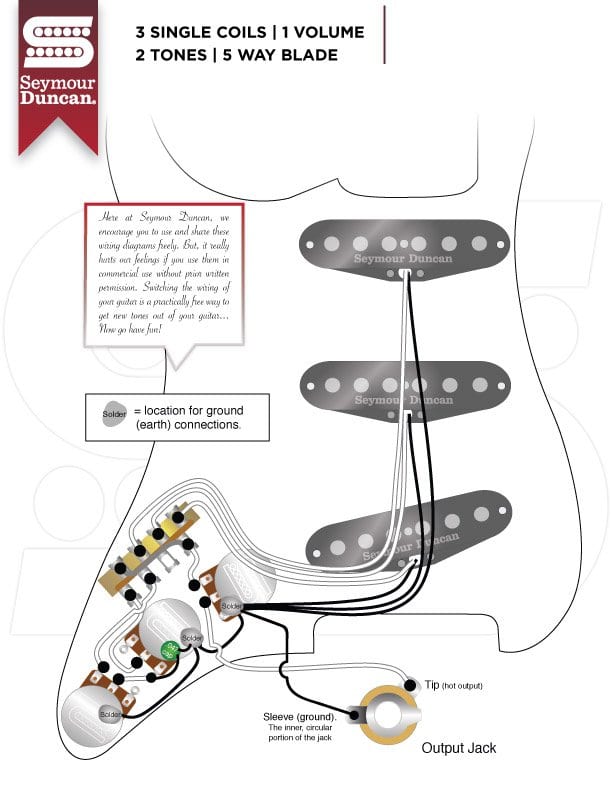
Fender Strat wiring diagram
If you look at this diagram you can see clearly how a typical Stratocaster is wired up and if you use this and your photo that you took earlier of your guitar, then you should have enough information to wire up your guitar.
Soldering Potentiometers
When soldering your potentiometers, take into account that they are big lumps of metal and will, therefore, need quite a bit of heat to get solder to stick to them. Set your soldering iron fairly high to get that big metal casing hot enough to take your solder.
You can use a little bit of sandpaper to roughen up the back of the pot’s casing, if you like. This will help the solder to adhere and make for a better connection. Always heat the pot and then the solder will flow freely onto the pot casing, don’t heat up the solder and drip it onto the pot case, as it will just create a poor solder joint.
Pot terminals are much smaller and easier to heat up. Twist your wire into a point and make sure you ‘tin the wire’ first. This just means that you have some solder melted onto the wire. It makes it easier then to connect it to the terminal. Poke the tinned wire through the little hole on the pot’s terminal and then heat the terminal, not the wire. The solder can then be added to the join as needed.
Remember: always heat the component and add the solder, never just heat solder and drip it onto the component.
The next articles will be covering capacitors, switches and more, providing you with a cheap way to upgrade your Squier’s sound. Make sure you check back in for more tips on how to make your guitar sound better.
Need some more explanation of how to approach this? The videos below are detailed and great for beginners.


More Information
Video
You are currently viewing a placeholder content from Youtube. To access the actual content, click the button below. Please note that doing so will share data with third-party providers.
You are currently viewing a placeholder content from Youtube. To access the actual content, click the button below. Please note that doing so will share data with third-party providers.
Note: This article contains advertising links that help us finance our site. Don’t worry: The price for you always remains the same! If you buy something through these links, we will receive a small commission. Thank you for your support!
- CTS 250k solid shaft potentiometer: Amazon
- CTS 250k Split Shaft Pot: Amazon
- Fender Strat wiring diagram: Seymour Duncan

This might also interest you
11 responses to “Make your Cheap Squier sound like an American Fender: Upgrade your Potentiometers!”
Much better idea presented here than the standard article, “change your tuning pegs.” Thanks man!!
Hope it helps you out, there are some more basic upgrade ideas coming soon and also some basic re-wiring examples. That will help you get different tones from your guitar’s controls coming after that.
This article is misleading. What the header promises is a change in Guitar *Tone* … yet it does not even *mention* how to address that in the article body … and for a good reason: Potentiometers do NOT affect Guitar Tone in any way. Period. Resistive value and taper have tolerance, meaning what % variation in value is acceptabe, usually 20%, and any decent commercial pot meets that, it´s not rocket Science. Worst case, if, say, taper or value is off, pot on 5 will actually be on 4 or 6 … if at all … so sound will be slightly louder or weaker than expected … but that is not a Guitar Tone change, just a slight volume variation. In a nutshell: replacing Pots will NOT “Make your Cheap Squier sound like an American Fender” by any means. Wood – Strings – Pickups – Setup – Action – even the cord you use to connect it to your amplifier will have more importance.
PS: a new pickup may cost 50% of your (cheap) Guitar price? So what? It will definitey improve your sound.
I get my guitar tones by using the controls on my guitar, a bit like Clapton did with his woman tone. So for players like myself it gives you better control over what your guitar sends to your amp. Cheap potentiometers on guitars just don’t give you as much control. Anyway, we all know that guitar tone is ‘in your fingers’ anyway…
Correct me if i’m wrong, but i read a years ago about resonance peaks shifting wih volume changes in single coils. Which means that the lowpass caused by the variable resistance was made resonant by the pickups inductance, so a humbucker delivers louder levels and so the resonant peak/cutoff is lower than with singlecoils which, will sound brighter. My point is: this is a small analog circuit, not digital, so each component is shaping specific things that afe due to the interaction, resistors are pretty much what gaves that filter shape, and as you can add resistance in many ways, i just feel that it cannot just be regarded as whatever we do think of his days of such a simple way of cleanily lower the volume without any timbre changes
This days*like:with a computer, no statics, no amp coloration
I’m kinda confused,I thought the audio taper is used as tone pots mostly..because on my guitar right now I use b500k as tone pot,and it just give effect at 0-1 or 2.. above that I heard nothing different. also my local tech recommend linear for volume and audio taper for tone
Your tech is correct, linear taper pots are usually used for volume, audio taper pots for tone, but it really doesn’t matter which you use, if you keep your tone and volume controls on 10. Jef has a point about the use of audio taper for volume if you only use 3-10 on your control,( same for tone control), because that does give you more precise control in that range, but I personally use linear taper pots for volume controls, as I use the entire range of my volume control(I play at 3 or 4 on my volume, then use the 5-10 range for swells and feedback,1-3 to clean up my distortion). Hope that helps you!
yes I’m doing the same like you with my vol..I use my tone control too when needed,to clean up some treble. I’m always on 10 when playing heavier stuff..but for mellow tone I use to dial both.I just can’t achieve it with linear on tone pot,might be trying to swap the linear to audio taper for volume someday just to hear how it goes.thank you both for lightened up.
I always use audio taper for Volume, mainly because the volume swell / curve is more sympathetic to my ear. However, I do use my Volume control a lot, because I tend to get my gain /clean sounds by riding the control. It means I can easily use that taper to get my guitar tones from clean to dirt, as all the action happens at the top end of the pot’s range.
Join the discussion…
You are currently viewing a placeholder content from Facebook. To access the actual content, click the button below. Please note that doing so will share data with third-party providers.
More InformationYou are currently viewing a placeholder content from Instagram. To access the actual content, click the button below. Please note that doing so will share data with third-party providers.
More InformationYou are currently viewing a placeholder content from X. To access the actual content, click the button below. Please note that doing so will share data with third-party providers.
More Information